Floors
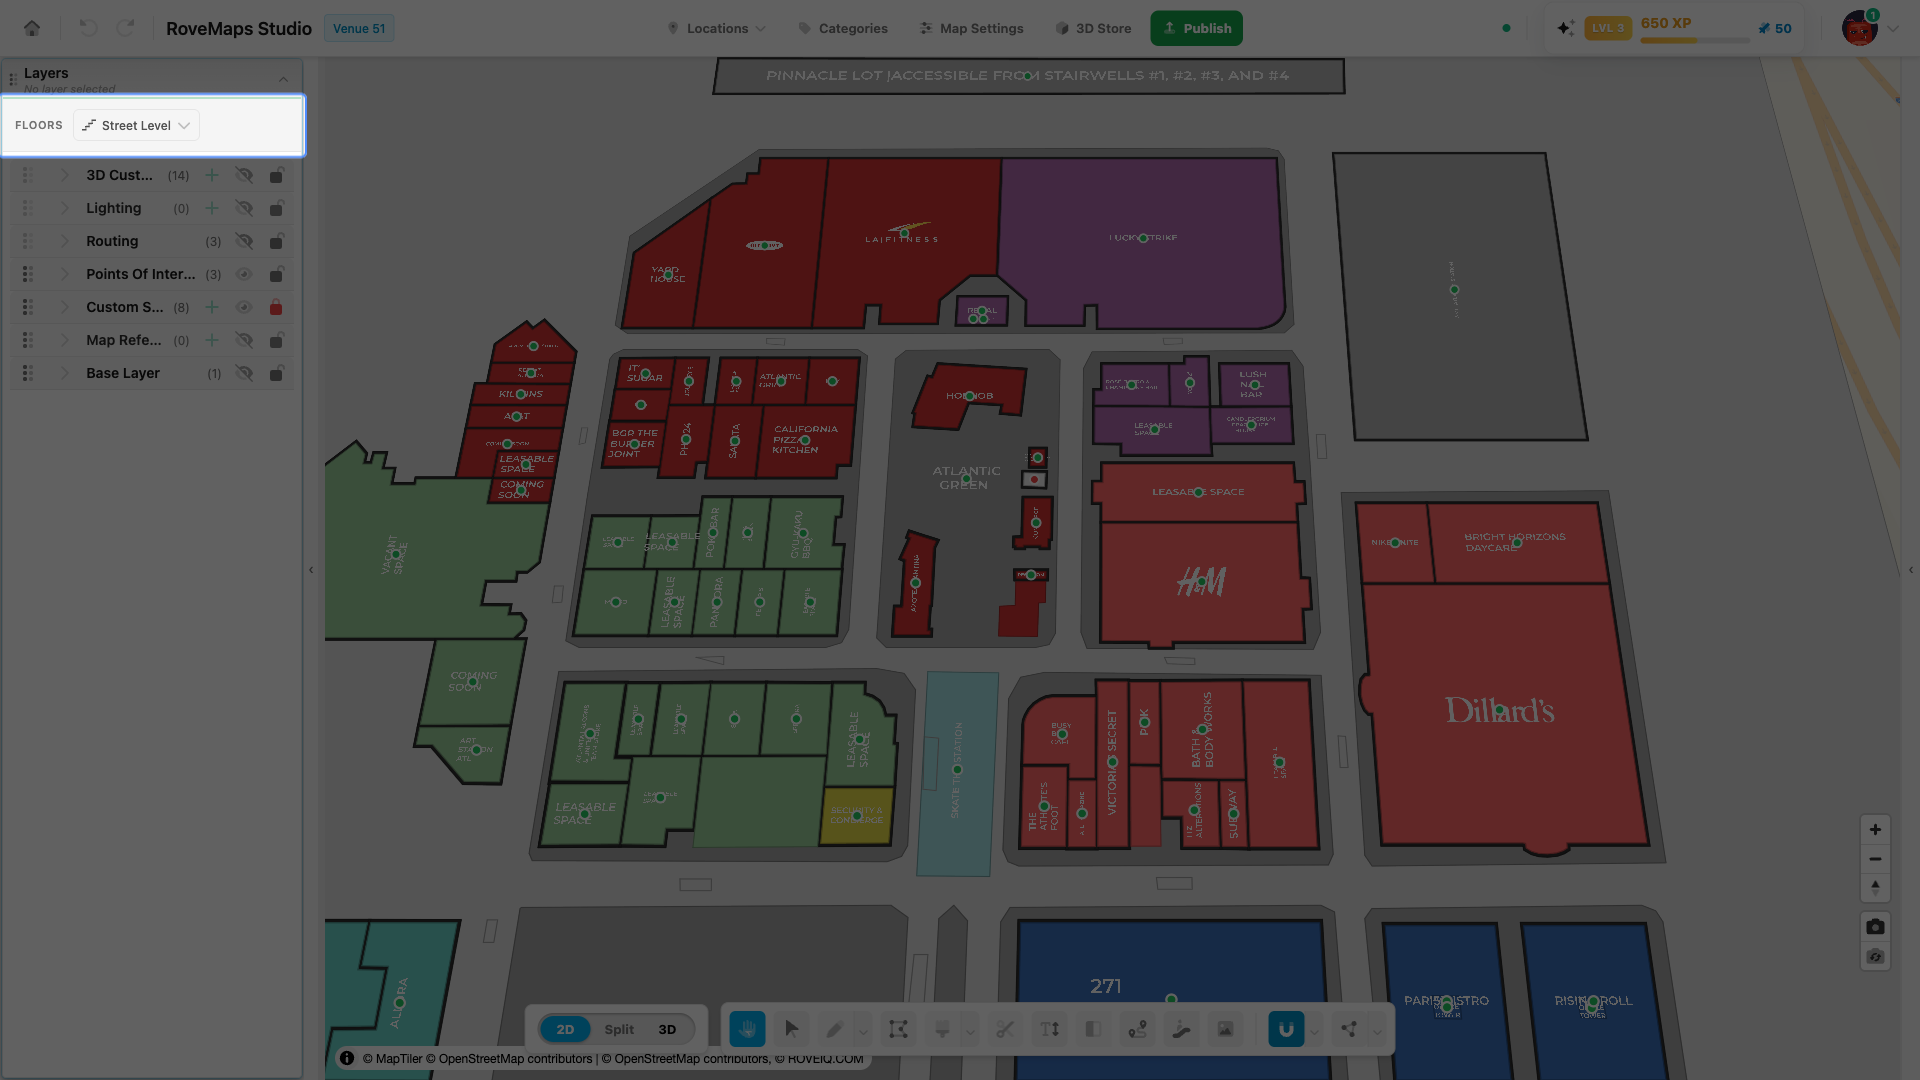
Floors organize a venue into stacked levels. Each floor holds its own structures and routing, and the editor shows one floor at a time. You switch between floors from the Floors strip at the top of the Layers panel.
The Floors strip
The Floors strip sits above the layer list in the Layers panel. It shows a button with the
current floor’s name (or Floor 1, Floor 2, and so on when a floor has no name). Click the
button to open the floor switcher.
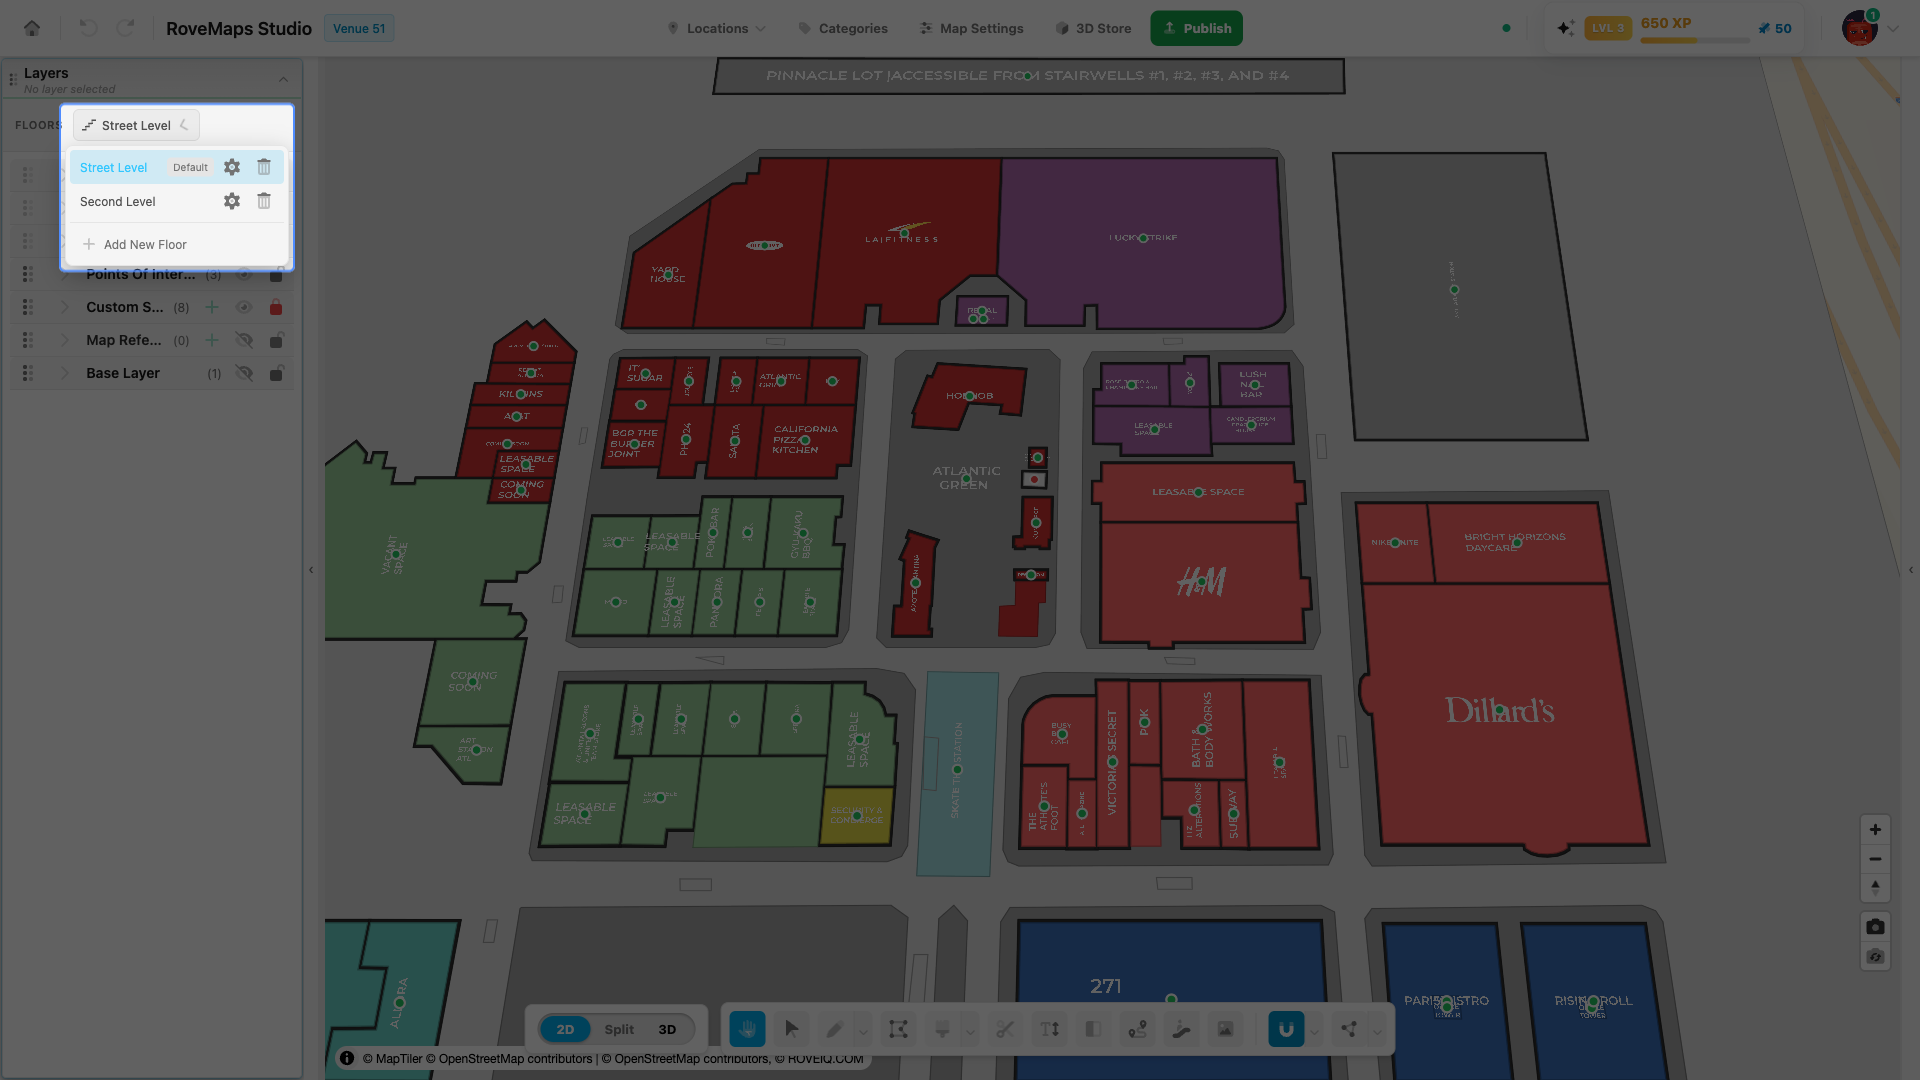
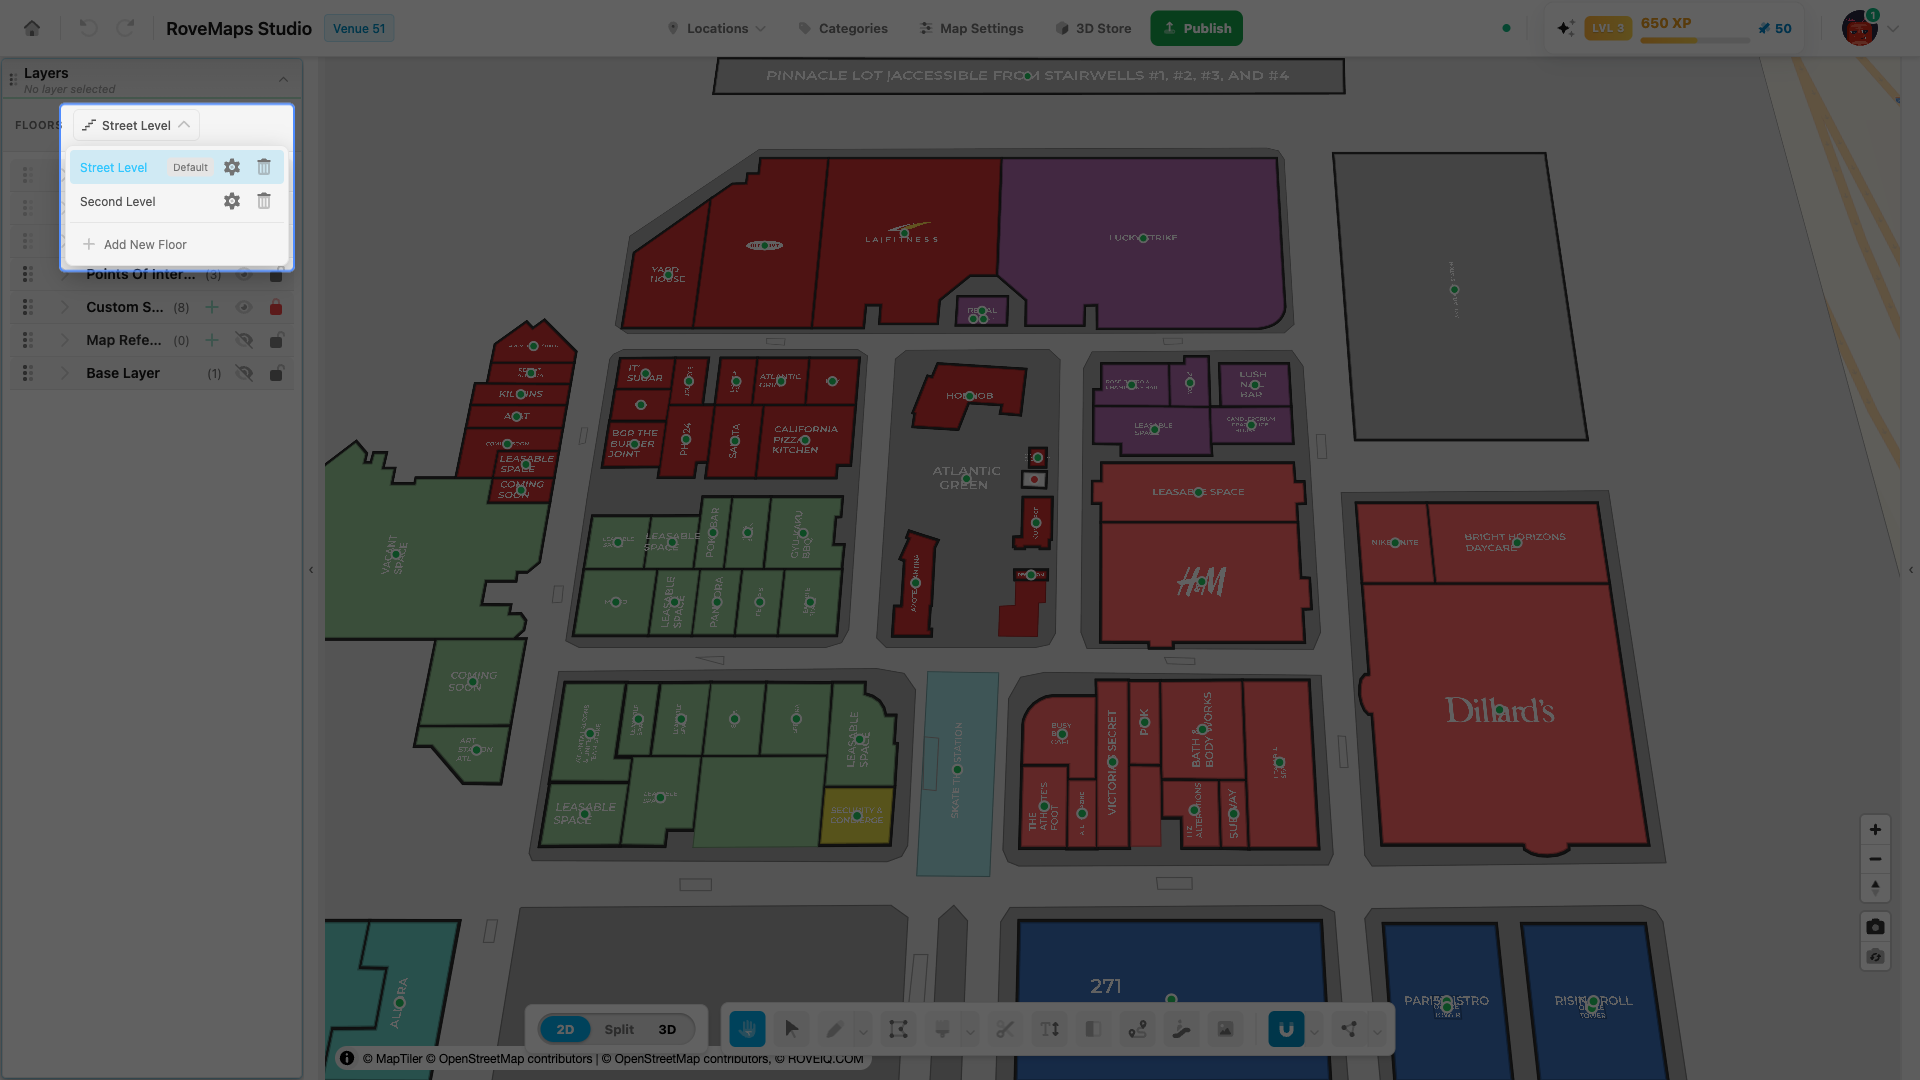
The switcher lists every floor in order and includes:
- The active floor, highlighted.
- A Default badge on the floor that opens first.
- A gear (Edit floor) button next to each floor.
- Add New Floor at the bottom of the list.
Click a floor to make it active. Switching floors also returns the editor to the Select tool, so an in-progress routing edit is closed when you change levels.
How floors organize the map
Floors are ordered by an Index value — a lower index appears earlier in the list. One floor is marked as the Default, which is the floor a draft opens on.
Each floor carries its own data. When you change the active floor, the editor filters the map to that level: structures, routing, and other floor-scoped layers render only when the current floor is one of their assigned floors. Layers with no floor assignment show on every floor.
Every floor has its own structures and routing layers. Once a venue has two or more floors, the editor also maintains a Floor transitions layer for connections such as stairs and elevators between levels.
Add a new floor
Add a floor whenever a venue has more than one level. A new floor starts empty and gets its own structures and routing layers so you can draw on it right away.
- Open the Floors strip in the Layers panel and click the floor button to open the switcher.
- Click Add New Floor. The Create Floor drawer opens.
- Enter a Name. A name is required — the floor will not save while the field is empty.
- Set the Index if needed. A lower index appears earlier in the list. New floors default to the next position after your existing floors.
- Set the Routing Line Height (meters) if needed. The default is
4.5. - Select Default floor to make this the floor a draft opens on. Only one floor can be the default. The first floor in a venue is marked default automatically.
- Click Create Floor.
Notes
- Creating a floor also stubs that floor’s structures and routing layers, so you can start drawing without reloading the editor.
- When the venue center is known, the new floor gets a starter label with the floor’s name.
- The first floor you add, or any floor you mark as the default, becomes the active floor right away. Otherwise, select the new floor from the switcher to start working on it.
- Once a venue has two or more floors, the editor adds a Floor transitions layer for connections between levels.
Publish impact: a new floor and its stubbed layers stay in your draft until you publish. On Publish, the floor is created upstream and receives its permanent ID, and its structures, routing, label, and transition layers are saved against it. Nothing about the new floor reaches the live map until you publish.
Update floor information
Edit an existing floor to rename it, change its Index, set it as the Default, or adjust its Routing Line Height.
- Open the Floors strip in the Layers panel and click the floor button to open the switcher.
- Click the gear (Edit floor) button next to the floor you want to change.
- The Edit Floor drawer opens with that floor’s current values. It has the same fields as Add a new floor — change what you need, then click Update Floor.
The drawer also shows a read-only Floor ID for reference; it can’t be edited. Reordering floors by Index re-sorts the strip so the lowest index is first.
Publish impact: floor edits stay in your draft until you publish. On Publish, a floor that already exists upstream is updated with your changes. A floor you added but have not published yet is still created on its first publish, carrying the values you set here. The live map does not reflect the edit until you publish.
Delete floors
See How to delete floors for the full walkthrough — what gets removed in the cascade, the guardrails, and how the deletion publishes.
Glossary
- Floor — one stacked level of the venue. Each floor holds its own structures and routing.
- Name — the floor’s label, shown in the Floors strip and switcher.
- Index — a floor’s sort order in the strip. A lower index appears earlier.
- Default floor — the floor a draft opens on; the editor selects it as the active floor on load (if none is set, the lowest Index opens). Only one floor can be the default; it shows a Default badge in the switcher. Set it from the Create Floor or Edit Floor drawer.
- Active floor — the floor currently shown in the editor. Switching floors changes which level you edit.
- Routing Line Height — the height, in meters, used for that floor’s routing lines.
- Floor transitions — the layer that connects levels (stairs, elevators, escalators). The editor maintains it once a venue has two or more floors.