Locations
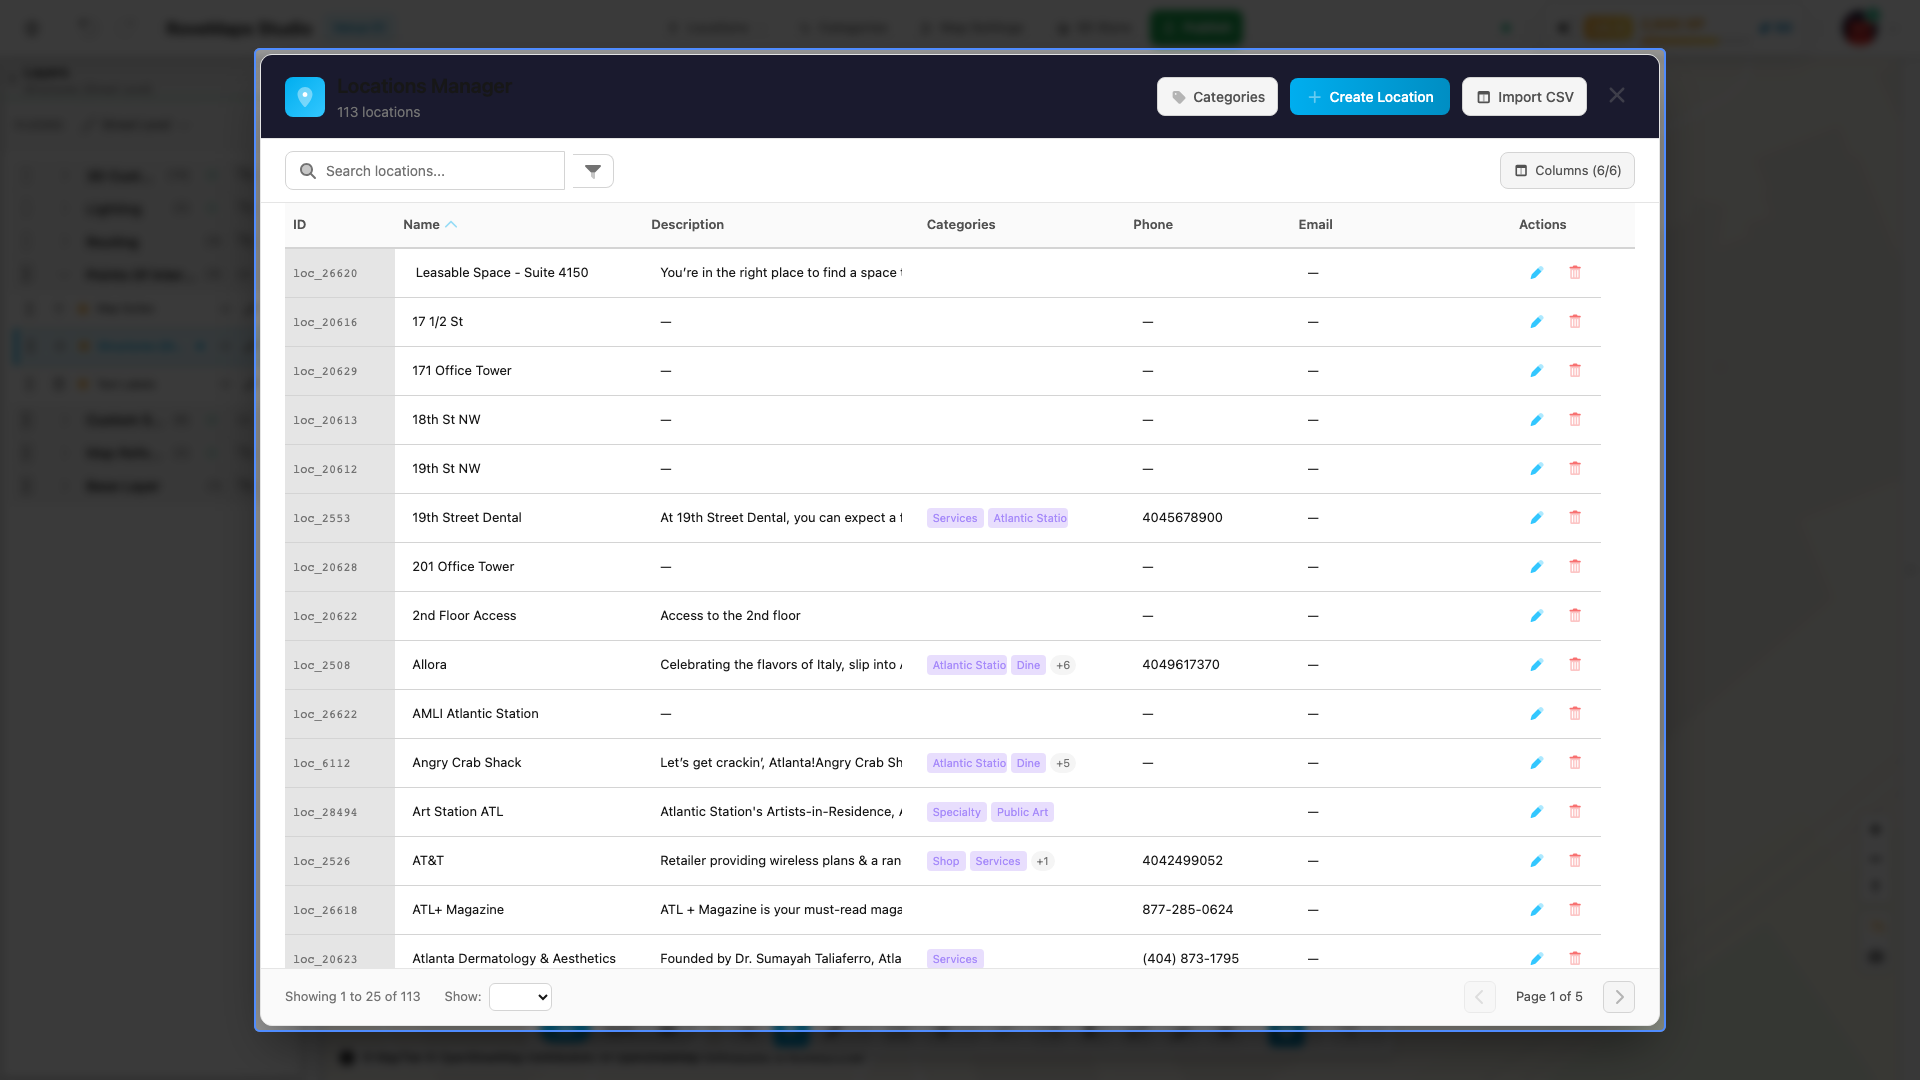
Locations are records — name, contact details, categories, and styling — that drive how a building’s label and appearance show on the map. Manage them from the Locations menu in the editor header; place one on the map by linking it to a structure.
Add a location
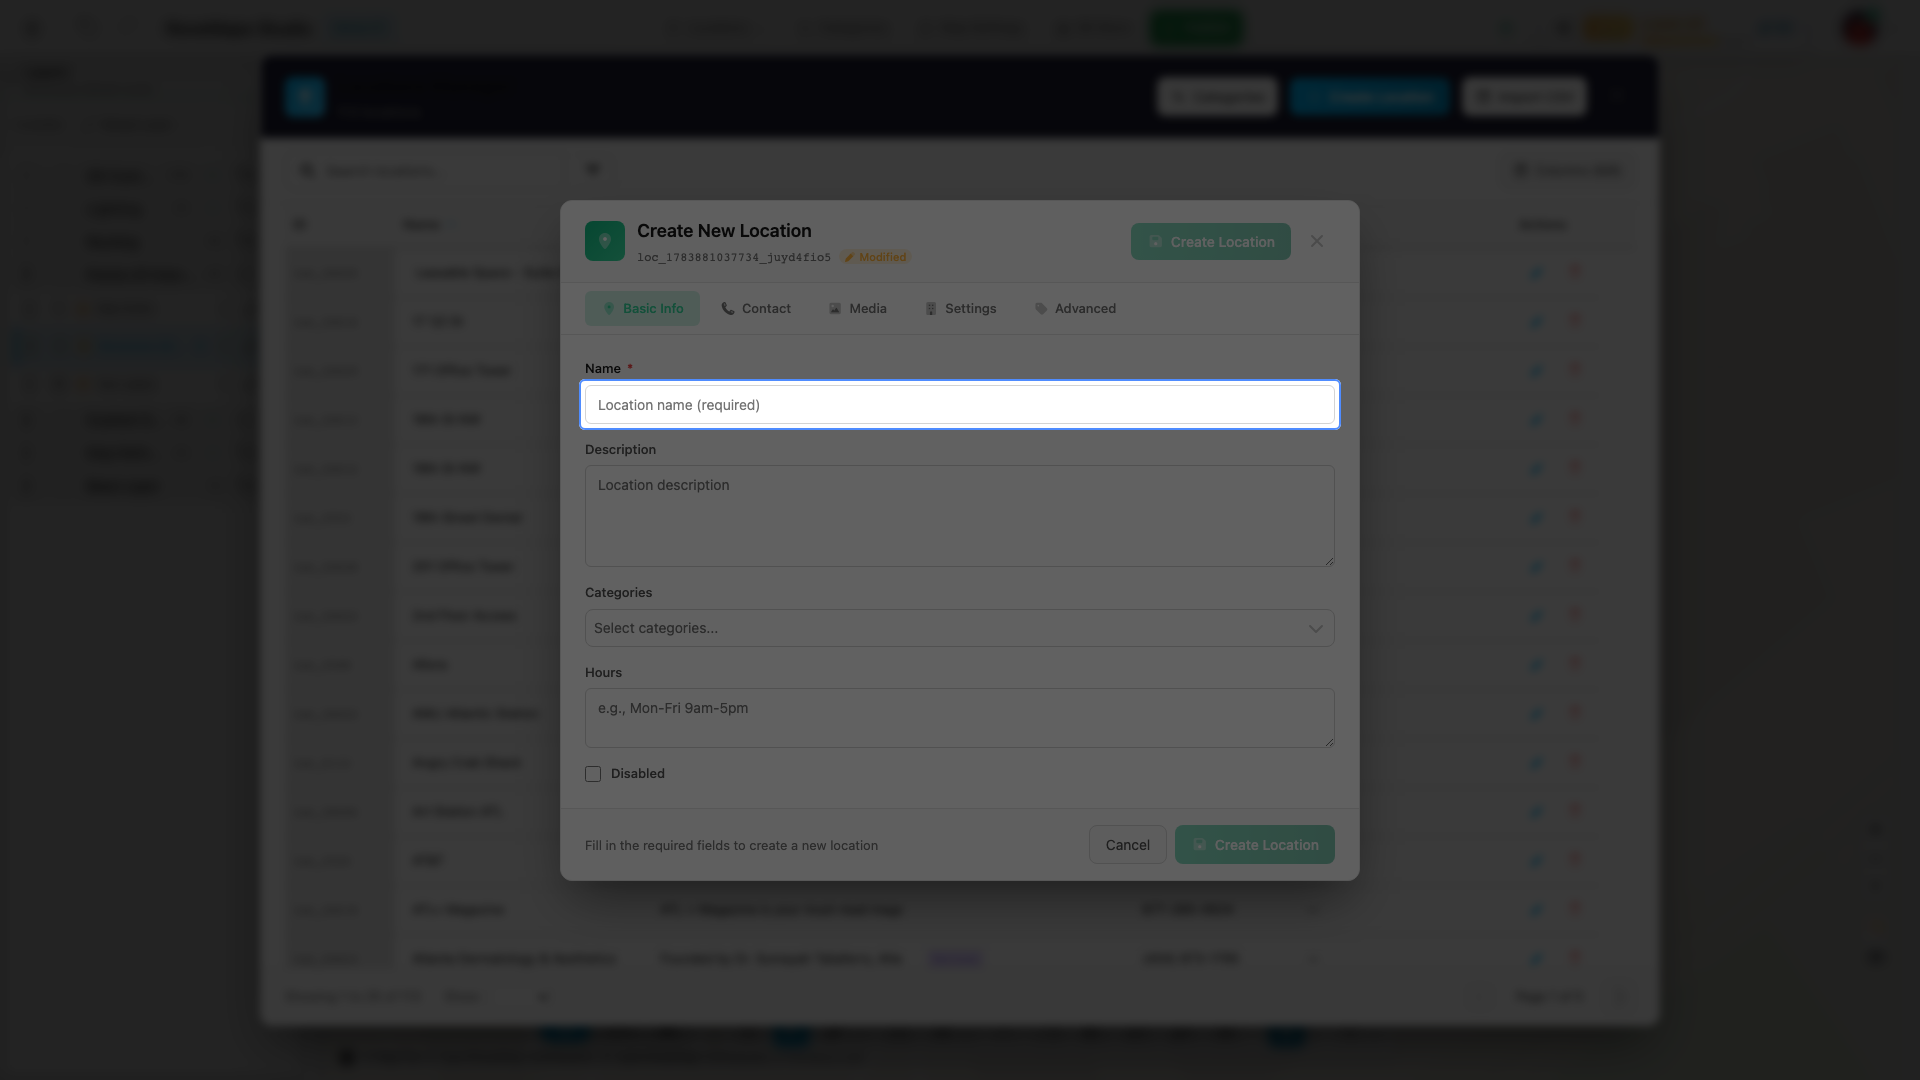
- In the editor header, open Locations and click Create Location. (Or click Edit Locations to open the Locations Manager, then click Create Location.) The Create New Location dialog opens.
- On the Basic Info tab, enter a Name. A name is required — the Create Location button stays disabled until the field has a value.
- Optionally fill the rest. Basic Info also has Description, Categories, and Hours. The other tabs cover Contact (phone, email, website, address, social links), Media (banner, logo, and menu images), Settings (title display, colors, building image), and Advanced (integration key, suite IDs).
- Click Create Location.
Notes
- A new location is added to your Locations list but is not on the map yet. Place it by linking it to a structure — see Link or unlink a structure.
- The categories in the picker come from the venue’s category list. Manage them from the Categories button.
- You can also create a location directly from a structure: select the structure, expand Location Association, and click Create Location to make and link a record in one step.
Publish impact: locations publish as their own records. A new location is marked as a new record in your draft and is created upstream on Publish. It does not reach the live map until you publish — and, to appear on the map, until it is linked to a structure.
Edit a location
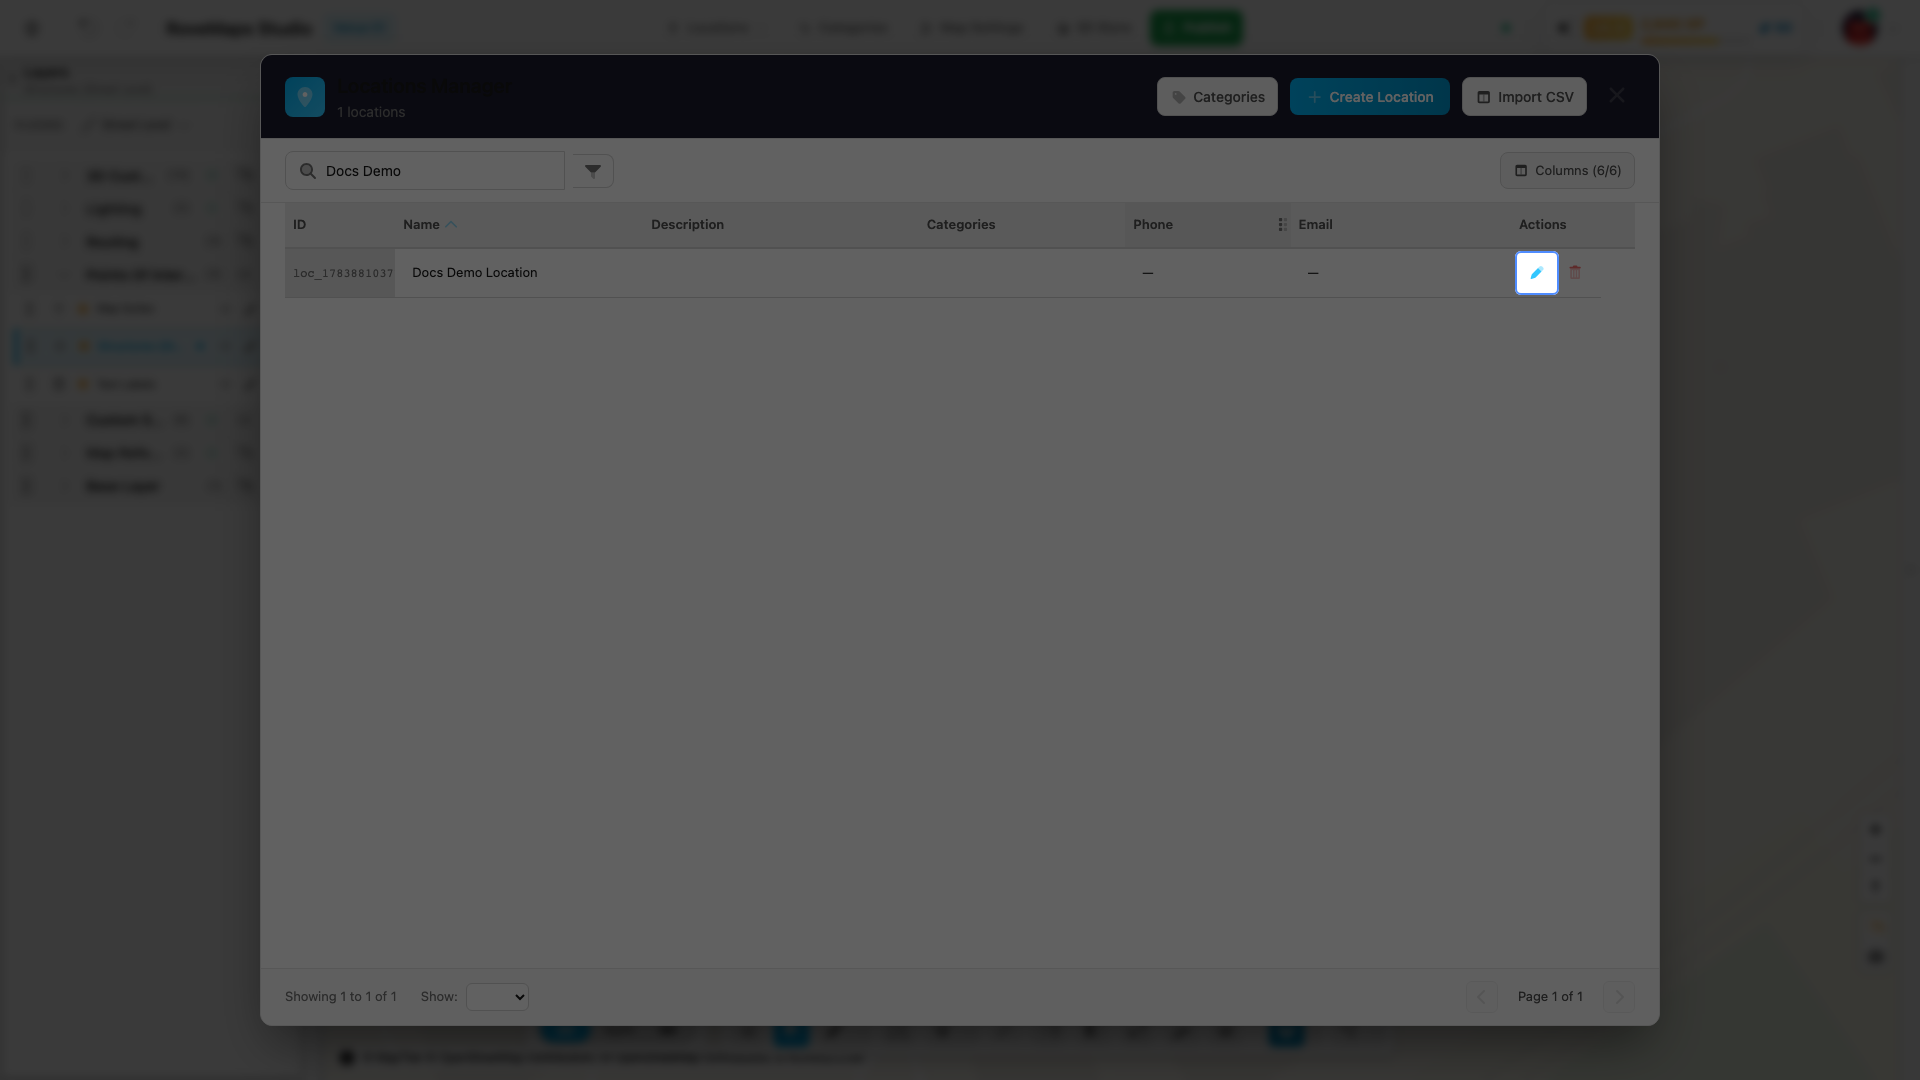
Open a location in its edit dialog from the Locations Manager:
- In the editor header, open Locations and click Edit Locations.
- Find the location in the table. Use Search locations… or the category filter to narrow the list.
- Click the Edit (pencil) action on its row. The edit dialog opens.
Or from a selected structure:
- Select the structure with Select to open its panel.
- Expand the Location Association section. The linked location’s name shows with edit, unlink, and delete actions.
- Click the Edit (pencil) action. The same edit dialog opens. This is available only when a location is linked to the structure.
The edit dialog groups fields into five tabs:
- Basic Info — Name, Description, Categories, Hours, and a Disabled checkbox that hides the location on the map.
- Contact — Phone, Email, and Website; an address block; and Social Media links.
- Media — Banner Image, Logo Image, and Menu Images.
- Settings — Title Display, Title Size, and Height; Building Color, Highlight Color, and Hover Highlight Color; and a Building Image with Width, Height, and Scale.
- Advanced — an Integration Key and Suite IDs, plus read-only ID, Created, Updated, and Status information.
The Locations Manager table also edits fields inline. Click a cell — such as Name, Description, or Phone — and type to change it. Use Columns to choose which fields show, up to six at a time. The ID and Updated columns are read-only.
Notes
- Changes save automatically as you type. The dialog header shows an Auto-saving indicator, and there is no Save button — click Close or the X when you’re done.
- When another editor is changing a field, their name appears beside it.
- A location managed by an external feed shows its fed fields as read-only with a Feed badge; edit those at the source.
- Settings set at the location level — such as building color and building image — apply to every structure the location is linked to.
Publish impact: edits are written to the location record in your draft and stay there until you publish. The updated record is marked as modified and is saved upstream as its own record on Publish.
Import locations from a CSV
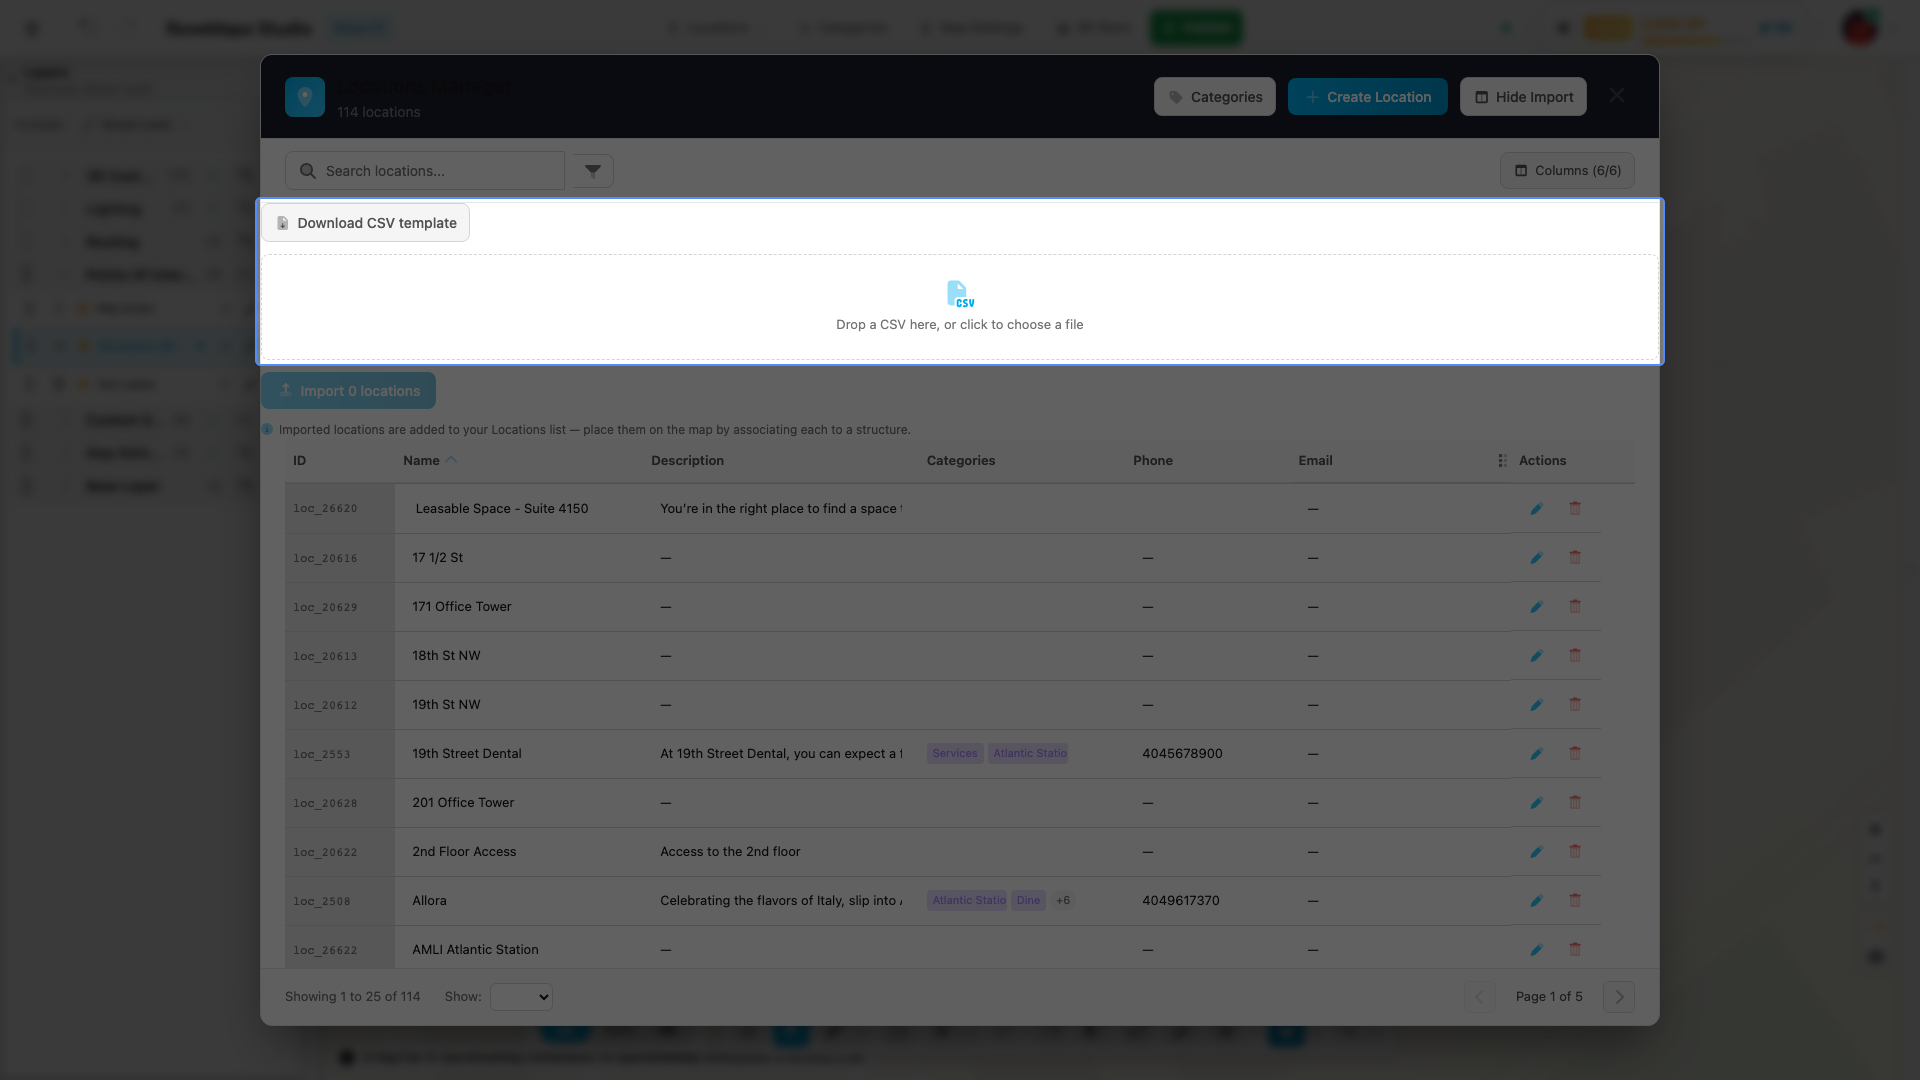
Bulk-add location records by importing a CSV. The importer creates records only — it does not place them on the map, so link each imported location to a structure afterward.
- In the editor header, open Locations and click Edit Locations.
- Click Import CSV to open the import section. (Clicking again, now labeled Hide Import, closes it.)
- Click Download CSV template to get a starter file (
locations_template.csv) with the supported columns and two sample rows — or download it right here: locations_template.csv. - Fill the template. Supported columns are
name(required),category,description,phone,email,url,address1,address2,city,state,zip, andhours. Column order does not matter, and unknown columns are ignored. - Drop the CSV onto the drop zone, or click it to choose a file. The importer parses the file and shows how many locations are ready to import.
- Click Import N locations.
Notes
nameis required. A row with an empty name is skipped and reported. If the header has nonamecolumn, the whole file is rejected.categoryis matched by name, case-insensitive, against your existing categories. An unmatched category is reported and the location imports without it.- The importer handles records only — there are no coordinate or floor columns. Imported locations are added to your Locations list; place them by linking each to a structure.
- Parse warnings (skipped rows, unknown categories) list under the drop zone and do not block the import.
Publish impact: imported locations are added to your draft as new records and are created upstream on Publish.
Link or unlink a structure
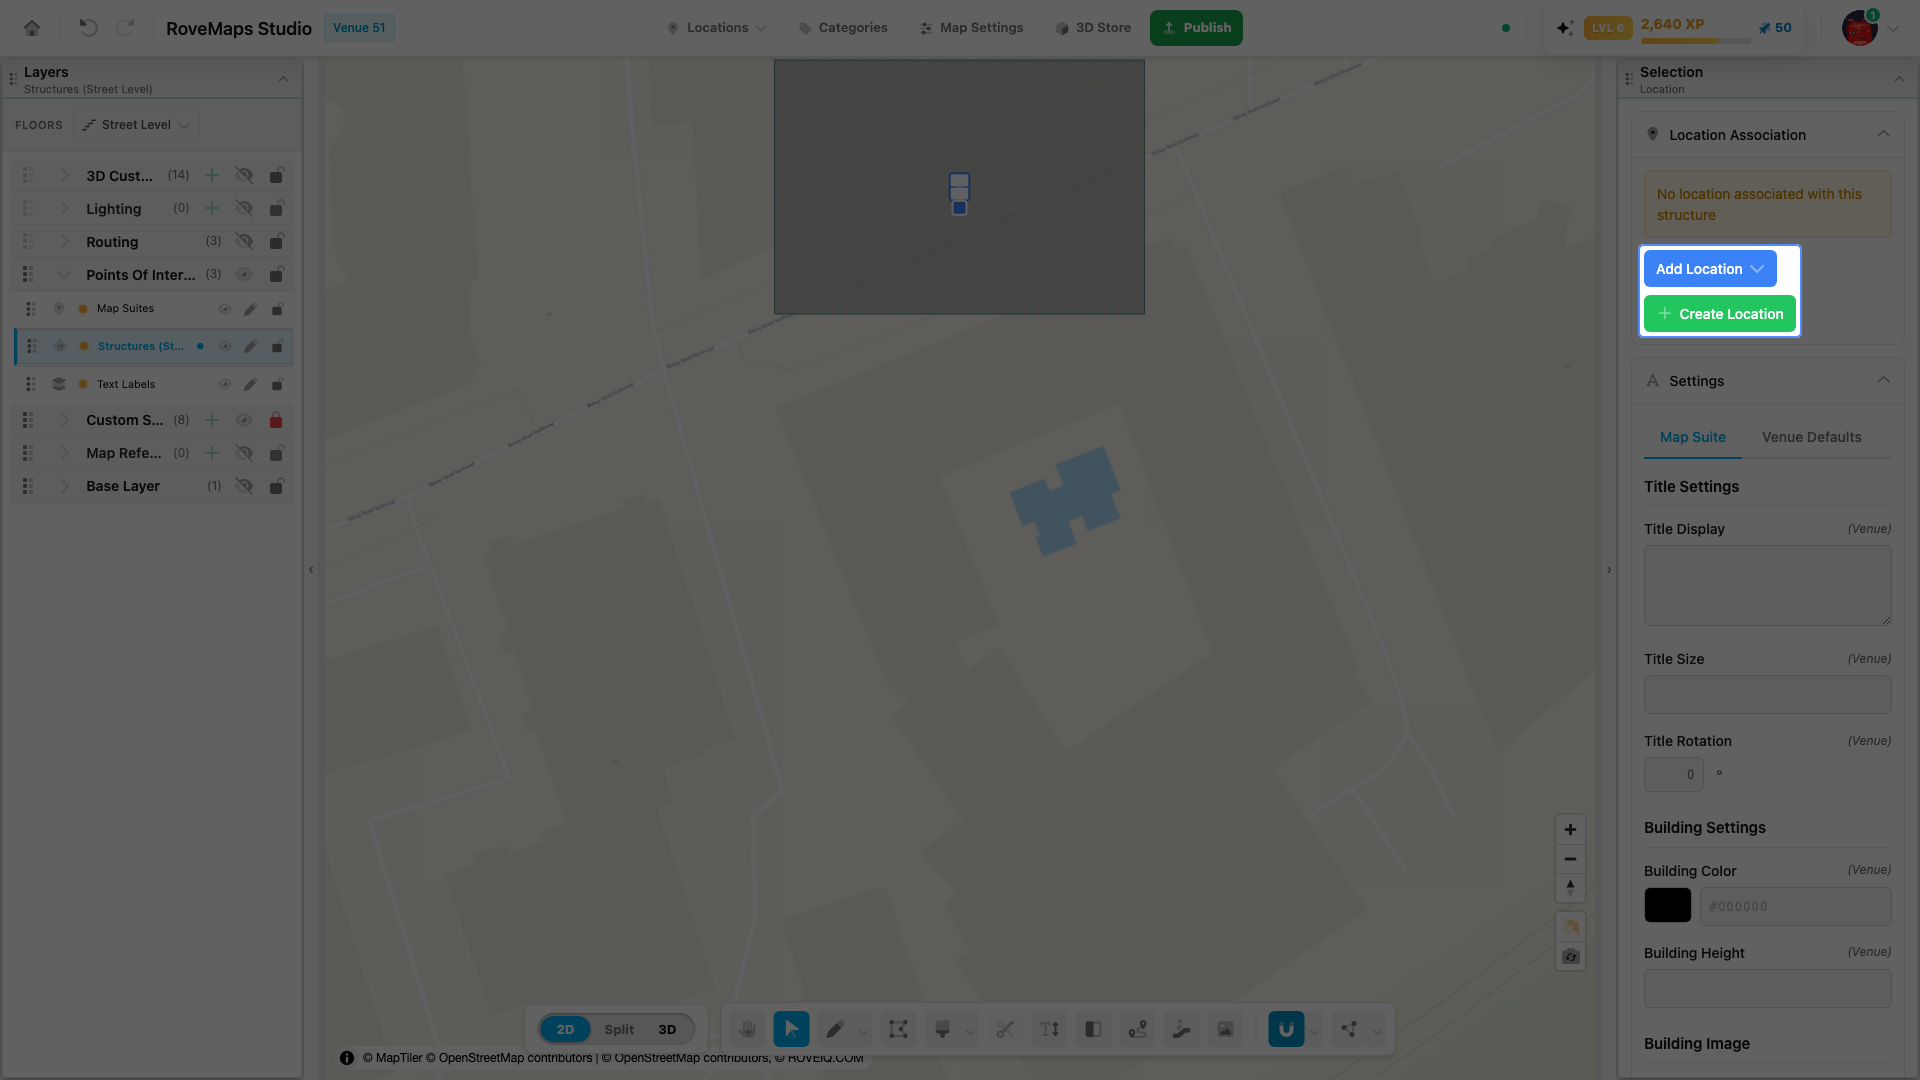
Locations are placed on the map by linking them to a structure. Linking binds a location’s name, styling, and visibility to the structure and its map suite. Unlinking reverts the structure to its default styling. Each structure holds one location association.
To link a location:
- Select the structure with Select to open its panel.
- Expand the Location Association section. It reads “No location associated with this structure” until one is linked.
- Link an existing location or create a new one:
- Add Location — click Add Location, search by name, and pick a location from the list.
- Create Location — click Create Location to make a new record and link it to this structure in one step.
- If the chosen location has a saved title position, a prompt asks whether to move the structure’s label to that position. Choose to move it or keep the current label position.
To unlink:
- Select the linked structure to open its panel and expand Location Association. The linked location’s name shows with edit, unlink, and delete actions.
- Click the unlink (link-slash) action — Remove Location Association.
- Confirm. The structure reverts to its default styling. The location record is not deleted.
Notes
- To change which location is linked, unlink the current one first, then link another.
- Remove Location Association keeps the location record. The trash (Delete Location) action both unlinks and marks the record for deletion on publish.
- Linking updates the location record, the structure, and its map suite together, so the label and building styling update immediately on the map.
Publish impact: link and unlink changes touch the location record, the structure, and the map suite in a single draft change. On Publish, locations are sent as their own records and the structure and suite publish as their own changes.
Change a structure color
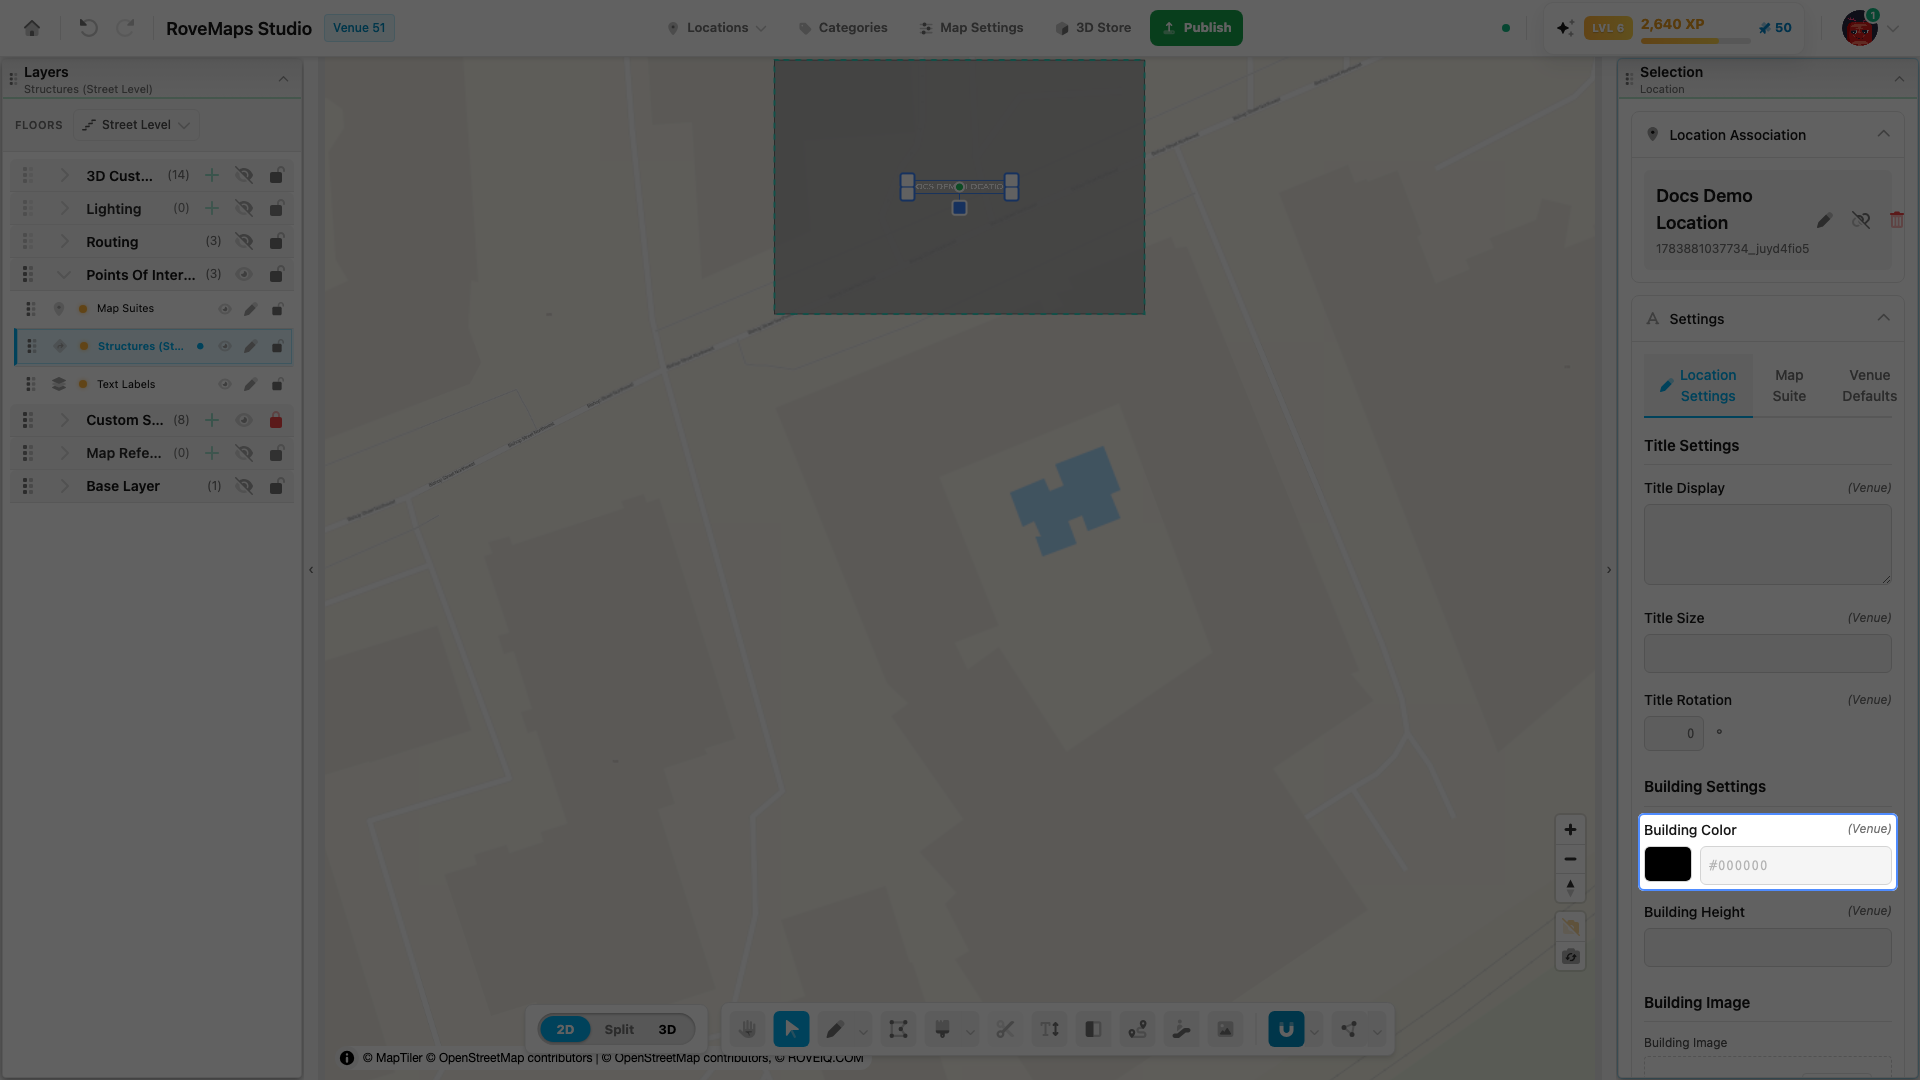
A structure’s fill color is set with Building Color in the Settings panel. Set it on the linked location, on the map suite, or view the venue default.
- Select the structure with Select to open its panel.
- Expand the Settings section.
- Choose the level tab: Location Settings (available when a location is linked) or Map Suite. Venue Defaults is read-only here.
- Under Building Settings, set Building Color with the color control.
Notes
- Building Color cascades: Location Settings overrides Map Suite, which overrides Venue Defaults. Setting it on Location Settings updates the location record, which colors every structure that location is linked to. Setting it on Map Suite updates only this structure’s suite.
- Use the field’s clear control to remove an override and fall back to the inherited color.
- Venue Defaults is read-only on this panel — change it from Open Venue Settings.
- Related colors live under Advanced Settings: Highlight Color and Selected Highlight Color.
- A disabled location locks its settings, and a feed-managed location may show some fields as read-only (see External location feeds).
Publish impact: set at the location level, the color publishes as part of the location record; set at the map suite level, it publishes with the suite and structure.
Add a building logo
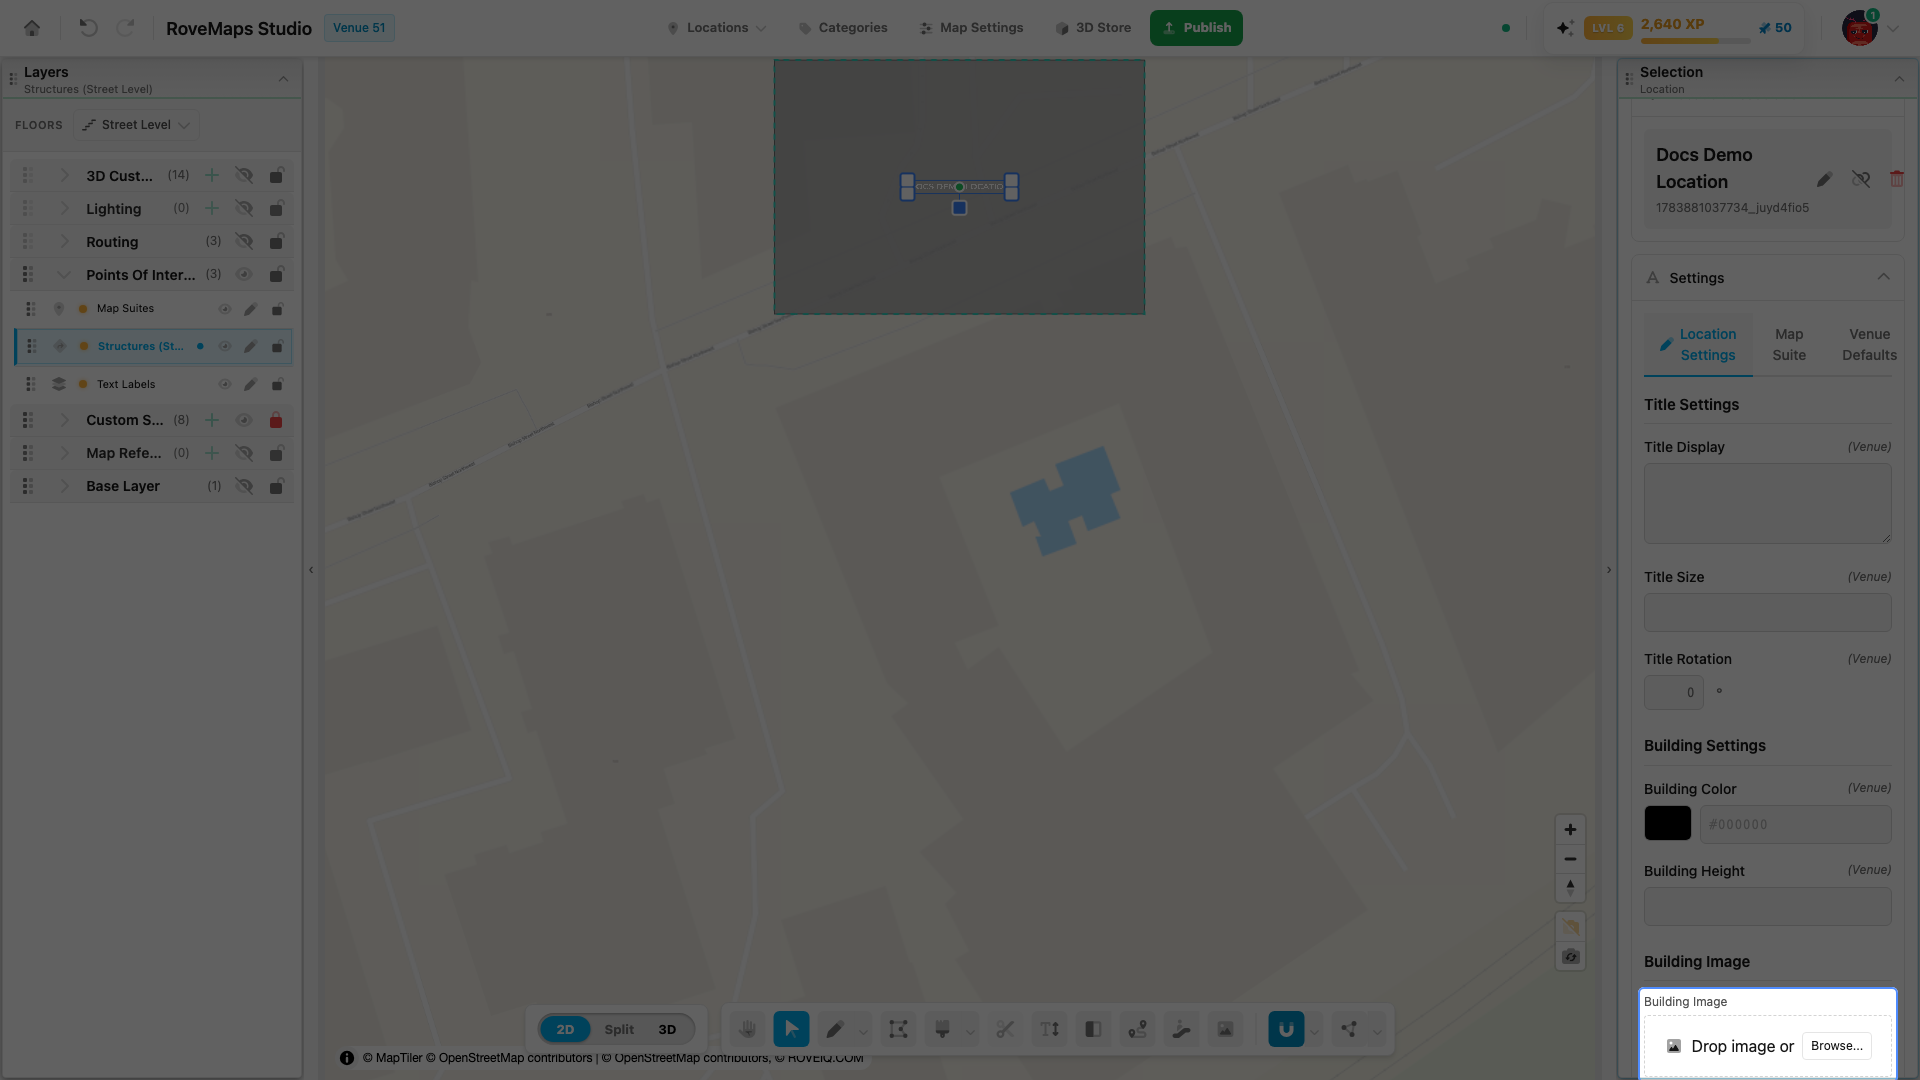
A building logo is set with the Building Image control. The image renders on the building in the 3D view, and you can set it on a location or on a single map suite.
- Select the structure with Select to open its panel.
- Expand the Settings section.
- Choose the tab to set the image on: Location Settings (available when a location is linked) or Map Suite.
- Under Building Image, drop an image onto the box or click Browse… to choose a file. The image uploads and a preview appears.
- Adjust Building Image Scale if the image needs to be larger or smaller on the building.
Notes
- The building image renders on the building in 3D. Switch to 3D or Split to see it — see View locations in 3D.
- Settings cascade: a value set at the location level overrides the map suite, which overrides the venue default. Use the field’s clear control, or the preview’s trash button, to remove the image and fall back to the inherited one.
- Add by URL appears when a higher level already provides an image, letting you override it with an image URL.
- You can also set the Building Image from the location’s edit dialog Settings tab, which adds Width, Height, and Scale fields.
Publish impact: the building image is stored on the location (or map suite) in your draft and is saved upstream on Publish.
View locations in 3D
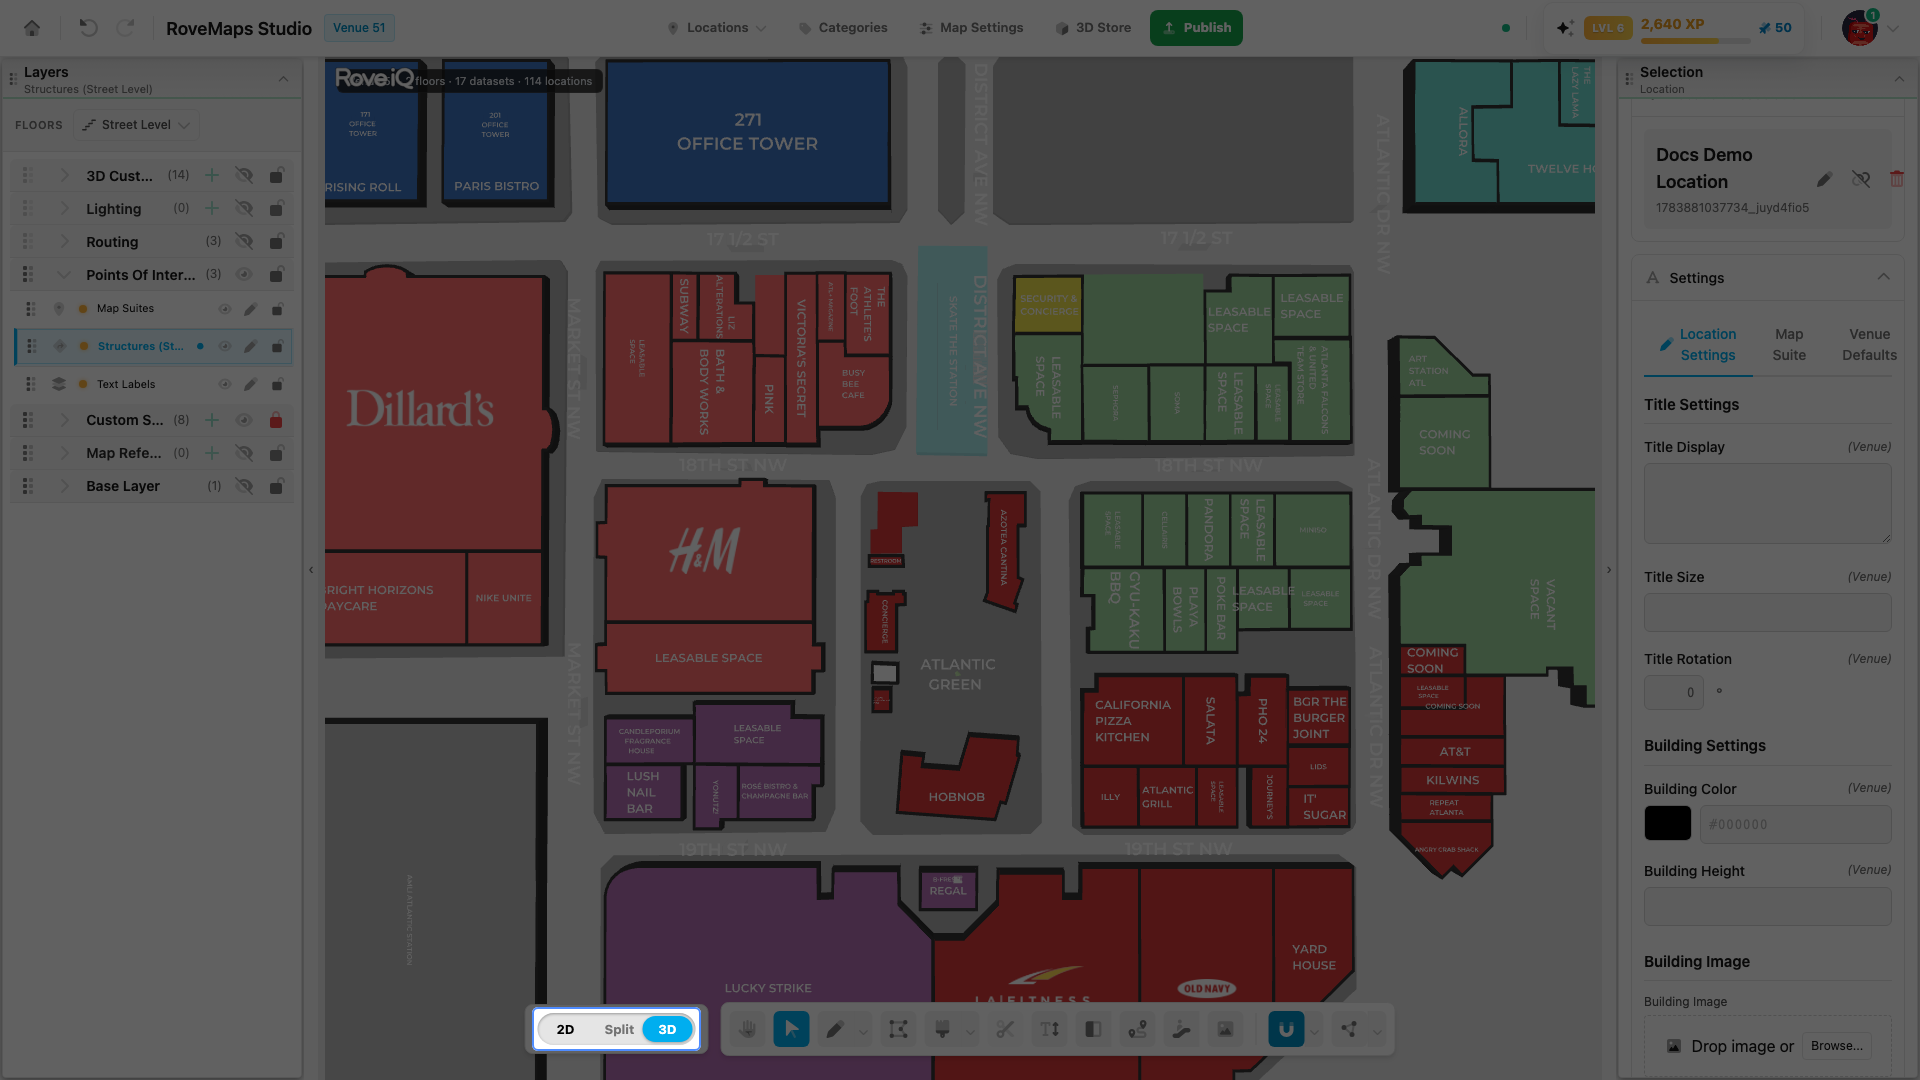
A location’s styling — its title, building color, and building image — renders on its linked structure in the 3D view. Switch the editor to 3D or Split to see it. This is a viewing change only and does not edit your draft.
- Link the location to a structure so it has a place on the map.
- In the editor view control, click 3D to show only the 3D scene, or Split to show the 2D map and the 3D view side by side.
- The linked structure renders with the location’s resolved title, building color, and building image.
Notes
- The 3D view reads from your live draft, so location edits — title, color, building image, enabled or disabled — appear without publishing.
- A location appears in 3D only through its linked structure. An unlinked location has no place on the map.
- Split and 3D stay locked until the required 3D setup is complete; 2D is always available.
- Disabling a location hides it on the map.
External location feeds
Feeding location data automatically from an external system is coming soon. A feed-managed location shows its fed fields as read-only with a Feed badge in the edit dialog and the Locations Manager.
Pull categories from the API
Pulling category data from the RoveMaps API is coming soon. Categories are managed from the Categories button in the editor header today.
Glossary
- Location — a record (name, contact, categories, styling) that drives a building’s label and appearance; placed on the map by linking to a structure.
- Locations Manager — the table view of every location record: search, category filter, inline cell editing, CSV import, and per-row actions.
- Location Association — the structure-panel section that links one location to the selected structure.
- Cascade — settings resolve Location Settings → Map Suite → Venue Defaults; the most specific level set wins.
- Feed badge — marks a field managed by an external data feed; edit it at the source.