Map References
A map reference is background artwork you bring into a venue to trace over — a floor plan, an existing GeoJSON dataset, or a vector drawing. References are guides for your editing; they are not part of the published map by themselves. You add them all from one place: the Image Reference button on the toolbar, the + on the Map References group in the Layers panel, or the reference step of the first-run setup wizard.
⭐ Recommended fast start: if you already have a floor plan, upload it, align it, and let Studio detect its shapes. One short flow creates both the original image reference and a generated polygon reference, giving you editable geometry without tracing every room by hand.
There are three kinds of reference, by the file you bring in:
- Raster — an image floor plan (PNG, JPG, TIFF) you place and scale over the map. PDFs are imported this way too: the page you choose is rendered to a high-resolution image.
- GeoJSON — an existing
.geojson/.jsondataset you overlay and copy features from. - Vector — an
.svgdrawing, converted to editable shapes on the map.
References are stored on the server the moment you add them, and removing one is finalized on your next Publish. That means a reference is safe to experiment with, and deleting it is reversible until you publish.
Open Upload Reference
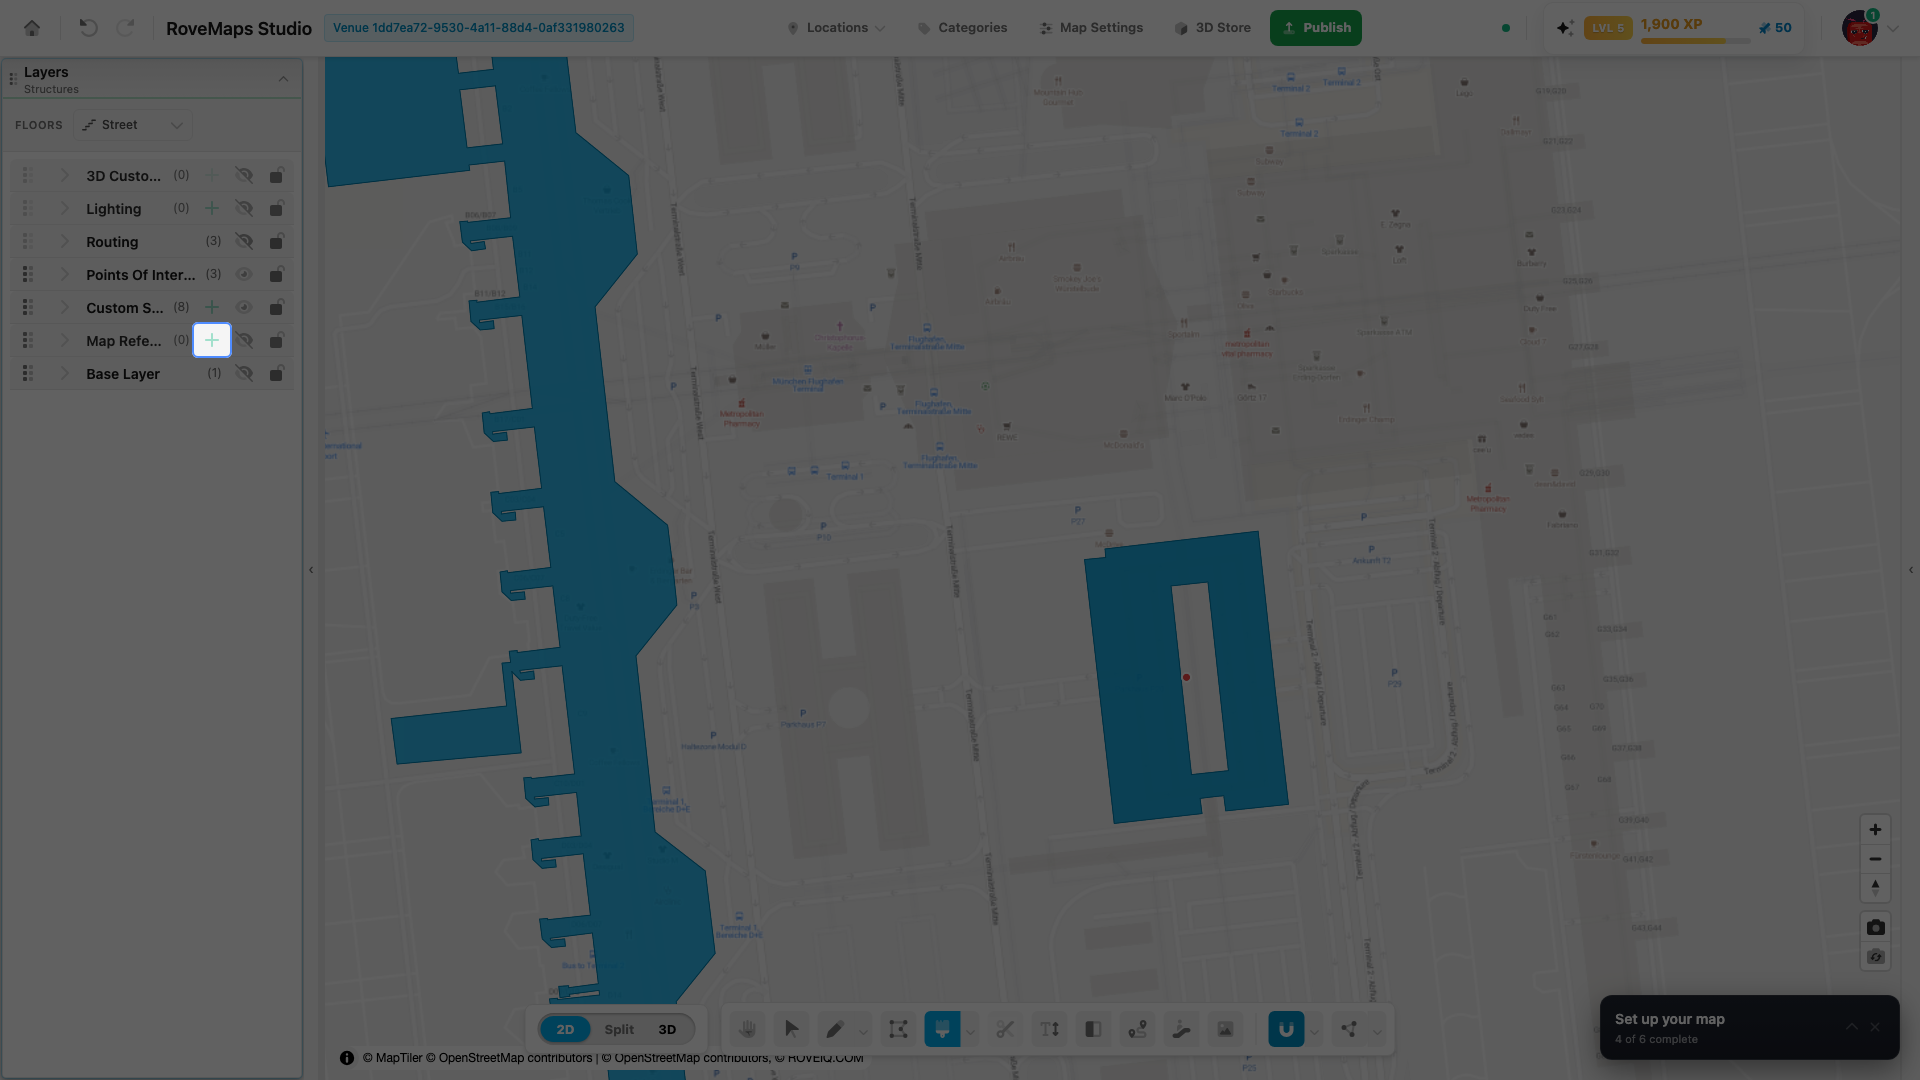
You can start the same workflow in either place:
- Click the small + beside Map References in the Layers panel; or
- Click Image Reference on the bottom toolbar.
Both open Upload Reference. The first-run setup wizard also embeds this uploader so a new map can start from a floor plan immediately.
Raster
Raster references are image floor plans — the most common way to start a new venue when you have a plan drawing but no data yet.
Upload a floor plan
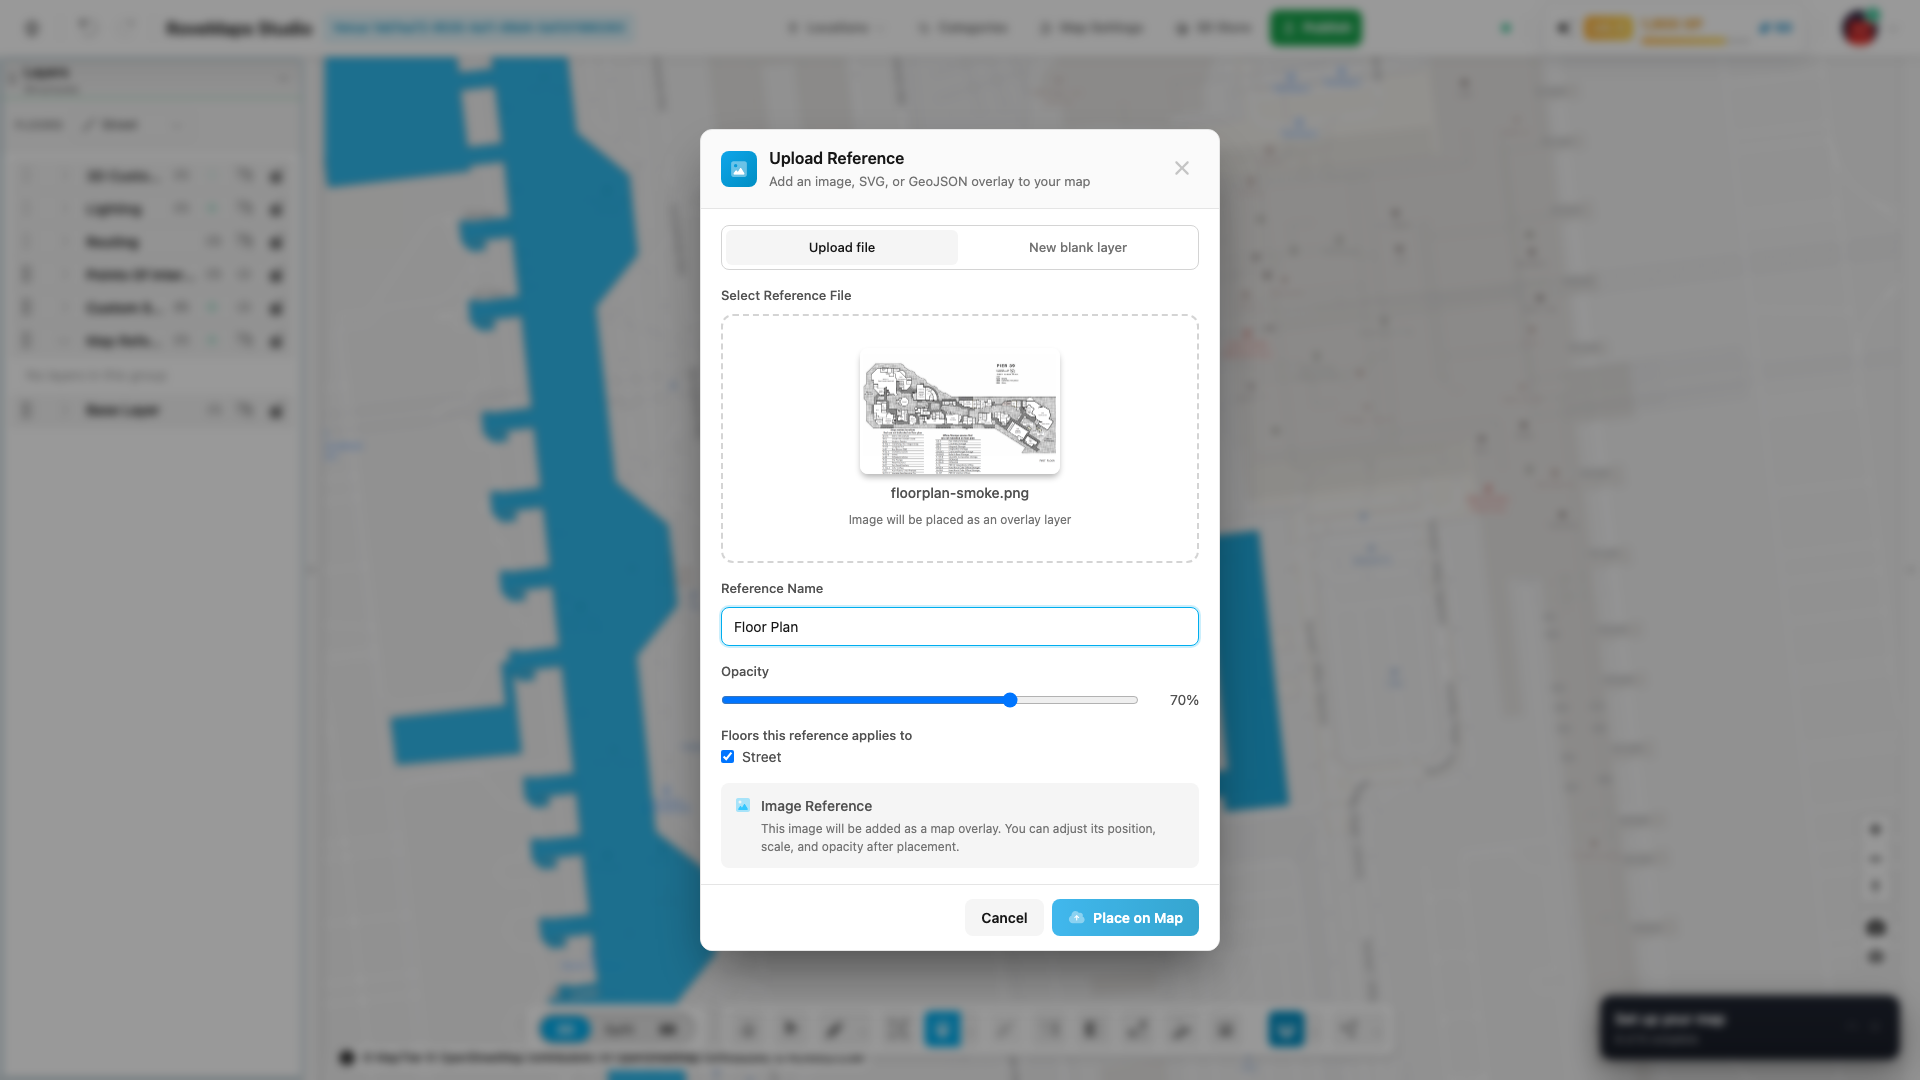
- Open the reference uploader (toolbar Image Reference, or the + on the Map References group).
- On the Upload file tab, drag a file onto the dropzone or click to pick one. Accepted image types are PNG, JPG, JPEG, and TIFF — or a PDF (see Import a PDF).
- Give the reference a name, set its opacity (default 70%), and choose whether it applies to all floors or the current floor.
- Click Place on Map to enter placement mode.
Notes — max file size 25 MB for images, 50 MB for PDFs; max 10,000 px per side. Publish impact: the uploaded reference is saved immediately; it renders as a background guide and is not published as map content on its own.
Position the floor plan
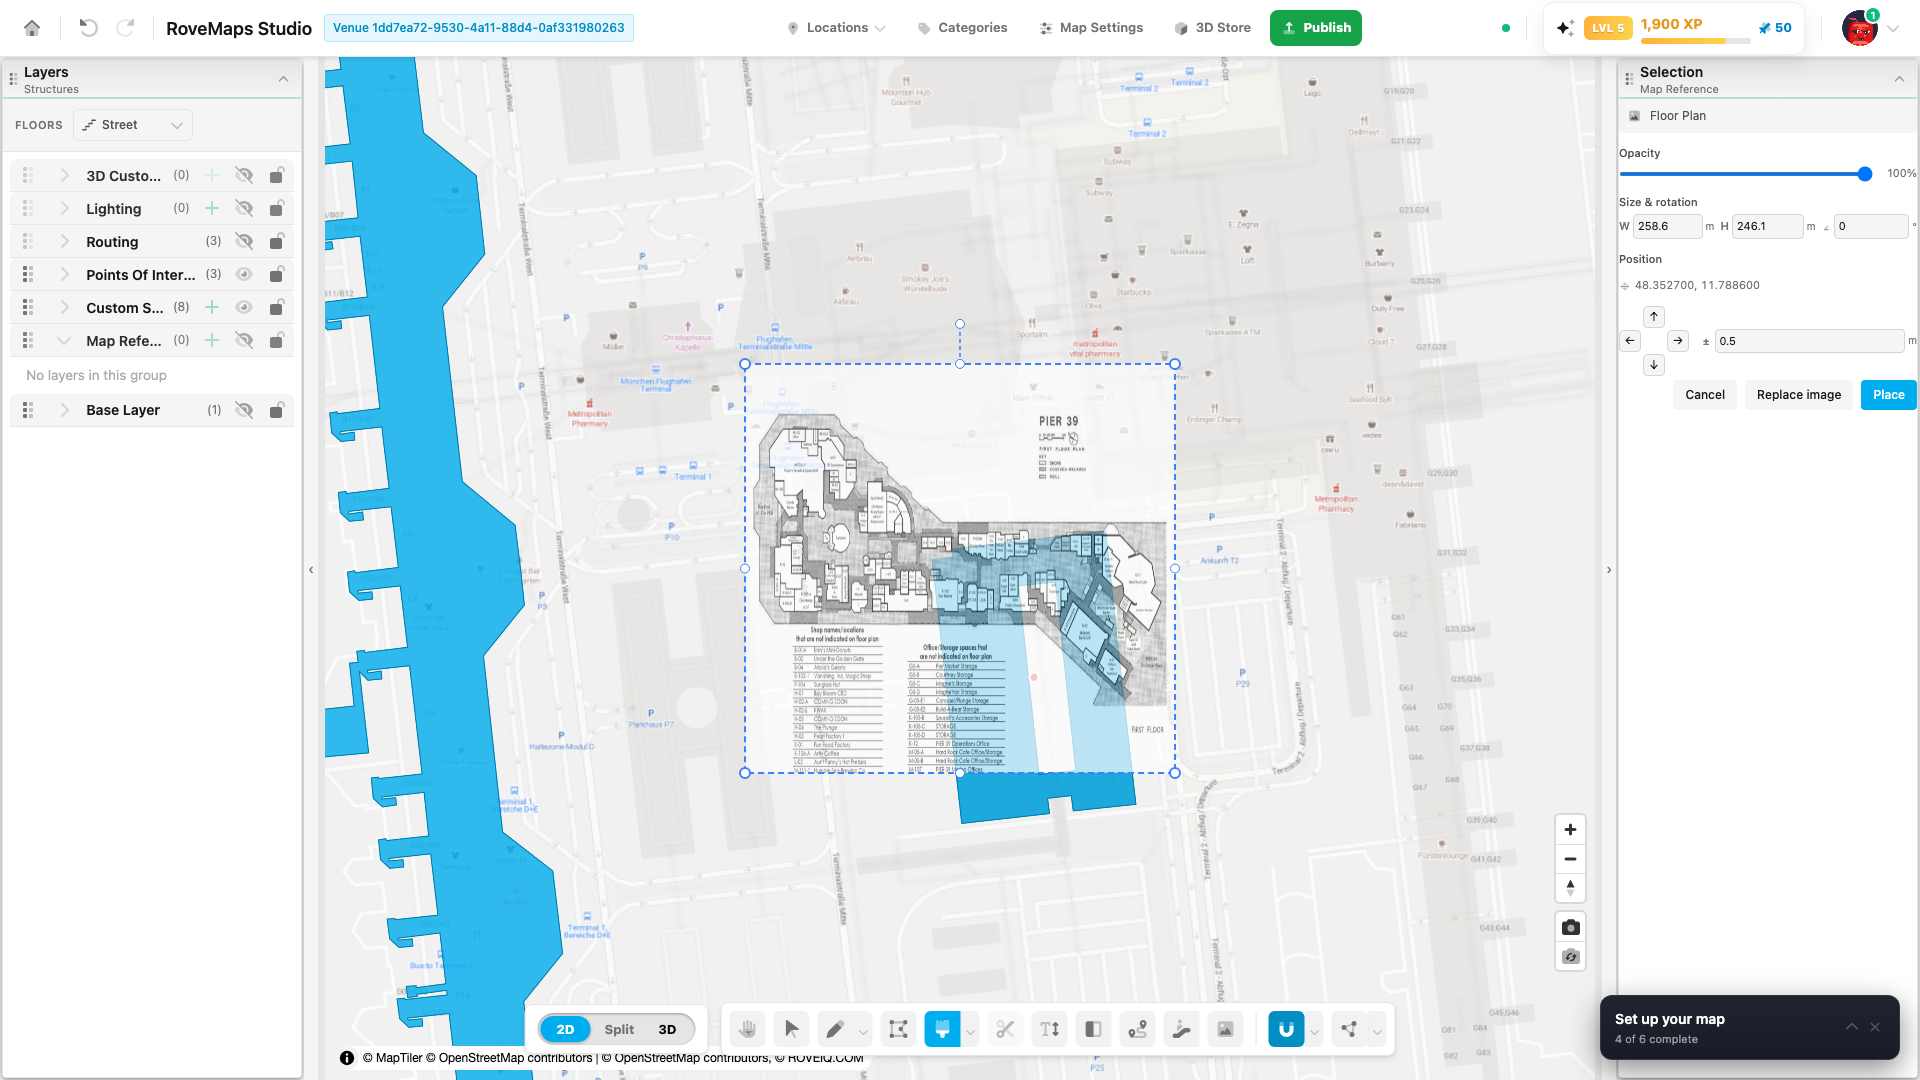
Place the image over the real-world map underneath it:
- Move — drag anywhere inside the image.
- Scale proportionally — drag a corner handle. Width and height change together.
- Stretch one axis — drag a middle handle on an edge. Only that width or height changes.
- Rotate — drag the handle connected above the image.
- Blend — lower Opacity so you can compare the plan against the base map.
- Click Place when everything lines up.
This is georeferencing: placing the plan at its true scale, rotation, and location so generated or traced features land in the right place. To correct it later, open the raster in Map References and choose Reposition.
Generate polygons with AI
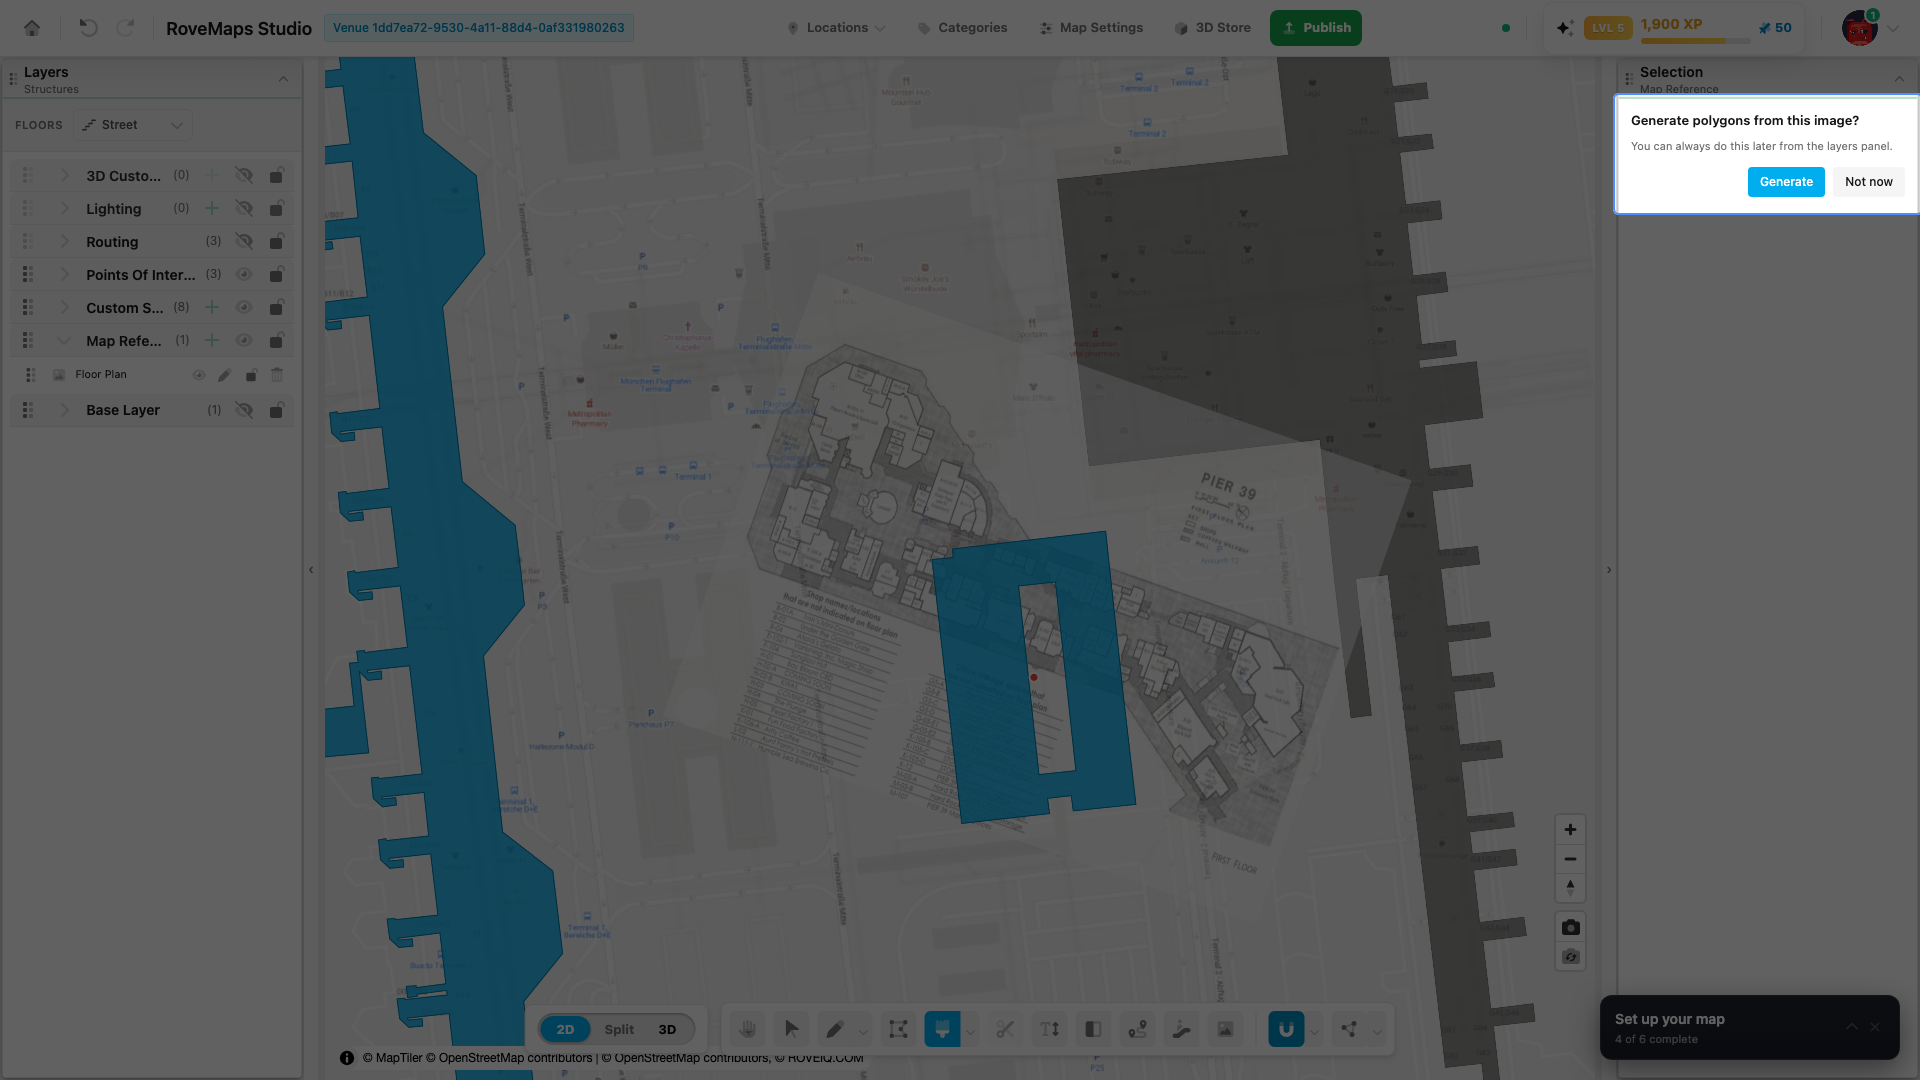
After you click Place, Studio immediately asks whether to generate polygons. Click Generate to open the Vectorize panel. You can also do this later by opening the raster reference and choosing Vectorize to Polygons.
- Choose Rooms (white) or Walls (dark) to match the drawing.
- Keep Smart cleanup on for automatic full-resolution cleanup, or turn it off to expose the advanced Threshold and Simplification controls.
- Move Min Area and Simplification to see the detected polygons and vertex totals update in the live preview. In the walkthrough above, both shape-detail sliders are returned fully left before creation.
- Review the polygon and vertex totals, then click Create Reference Layer.
The Layers panel now shows two reference layers:
- The original raster floor plan, retained as the visual source.
- A new GeoJSON polygon reference, containing the generated features.
The generated polygons are editable reference features. To make them publishable map content, open the generated layer and use Copy All to… to copy them to Structures, Custom Styles, or another real map layer.
Notes — detection runs locally in your browser; large plans take a few seconds.
GeoJSON
GeoJSON references let you bring in data you already have — from another tool, an export, or a previous project — and copy the parts you want into your map.
Import a GeoJSON file
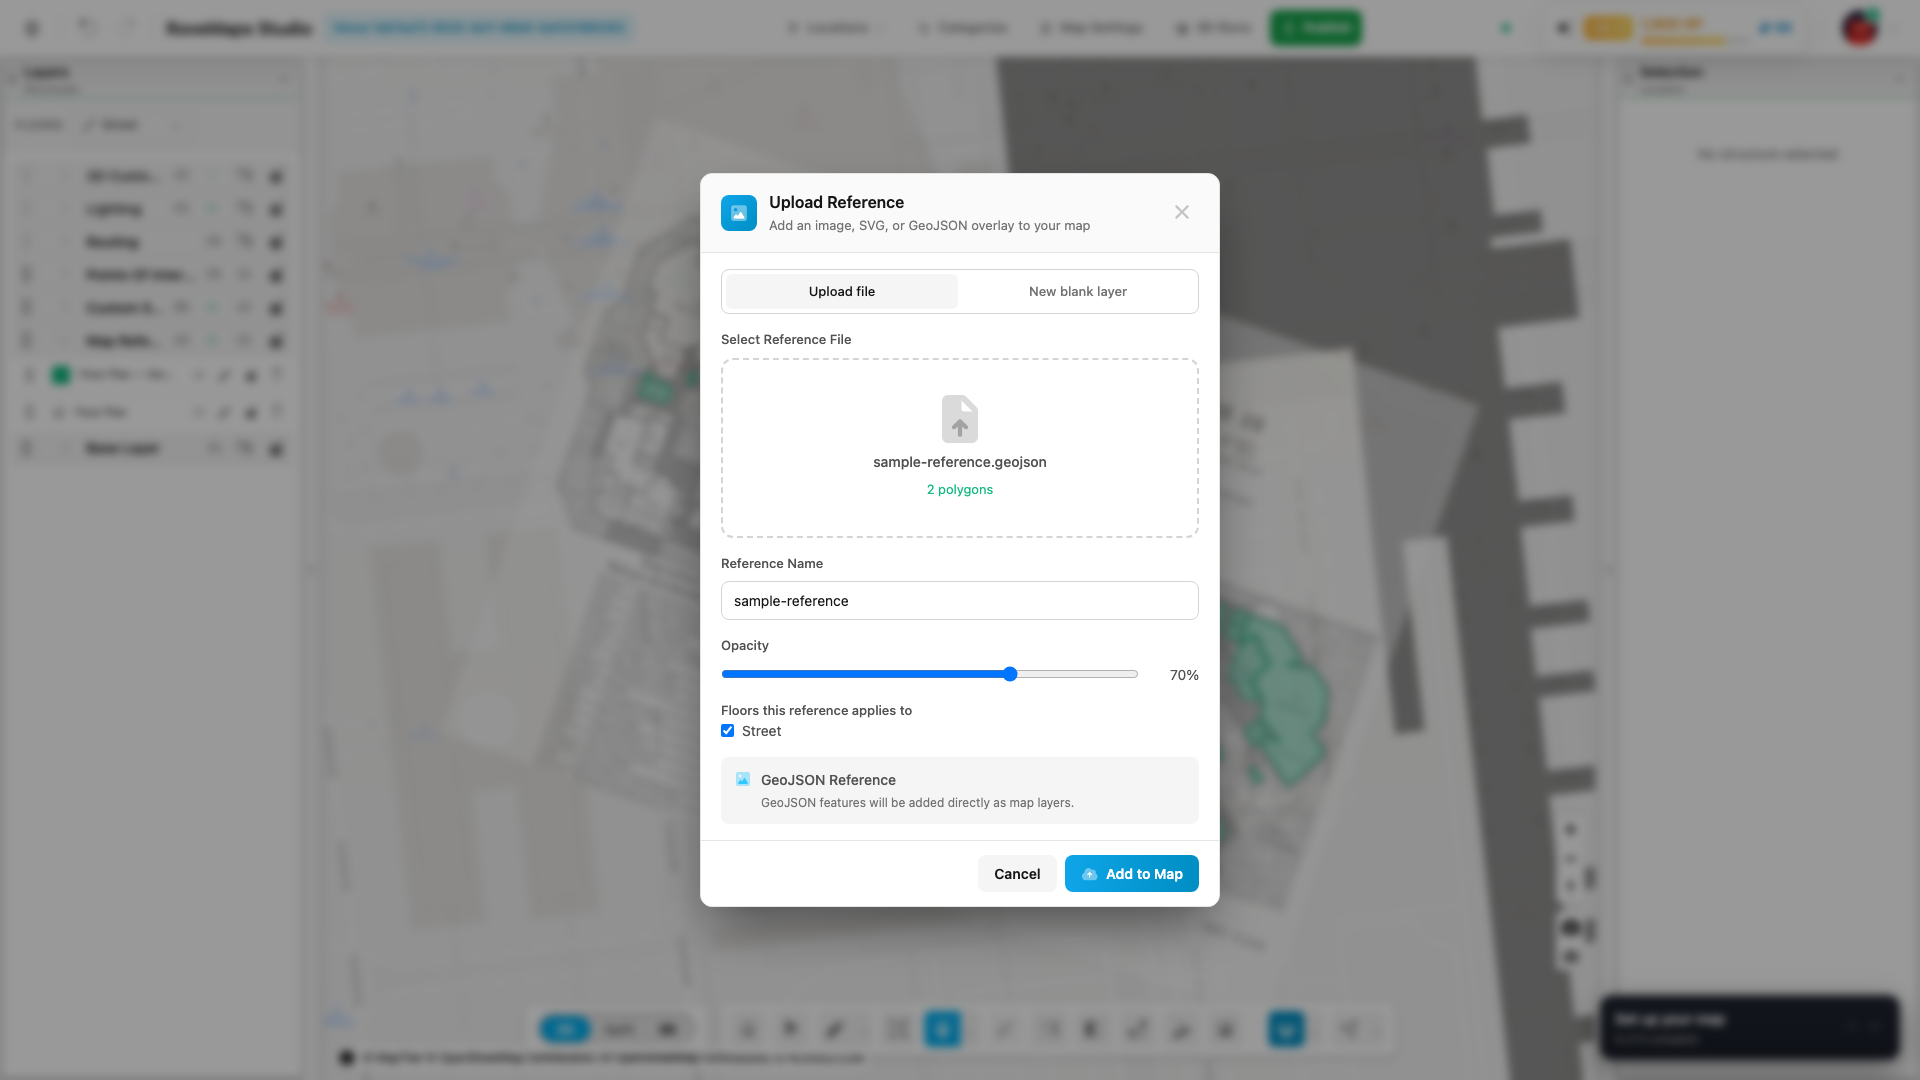
- Open the reference uploader and, on the Upload file tab, pick a
.geojsonor.jsonfile. - Name it and choose its floor scope.
- Click Add to Map. The dataset overlays the map as a reference you can trace or copy from.
Copy features to a layer
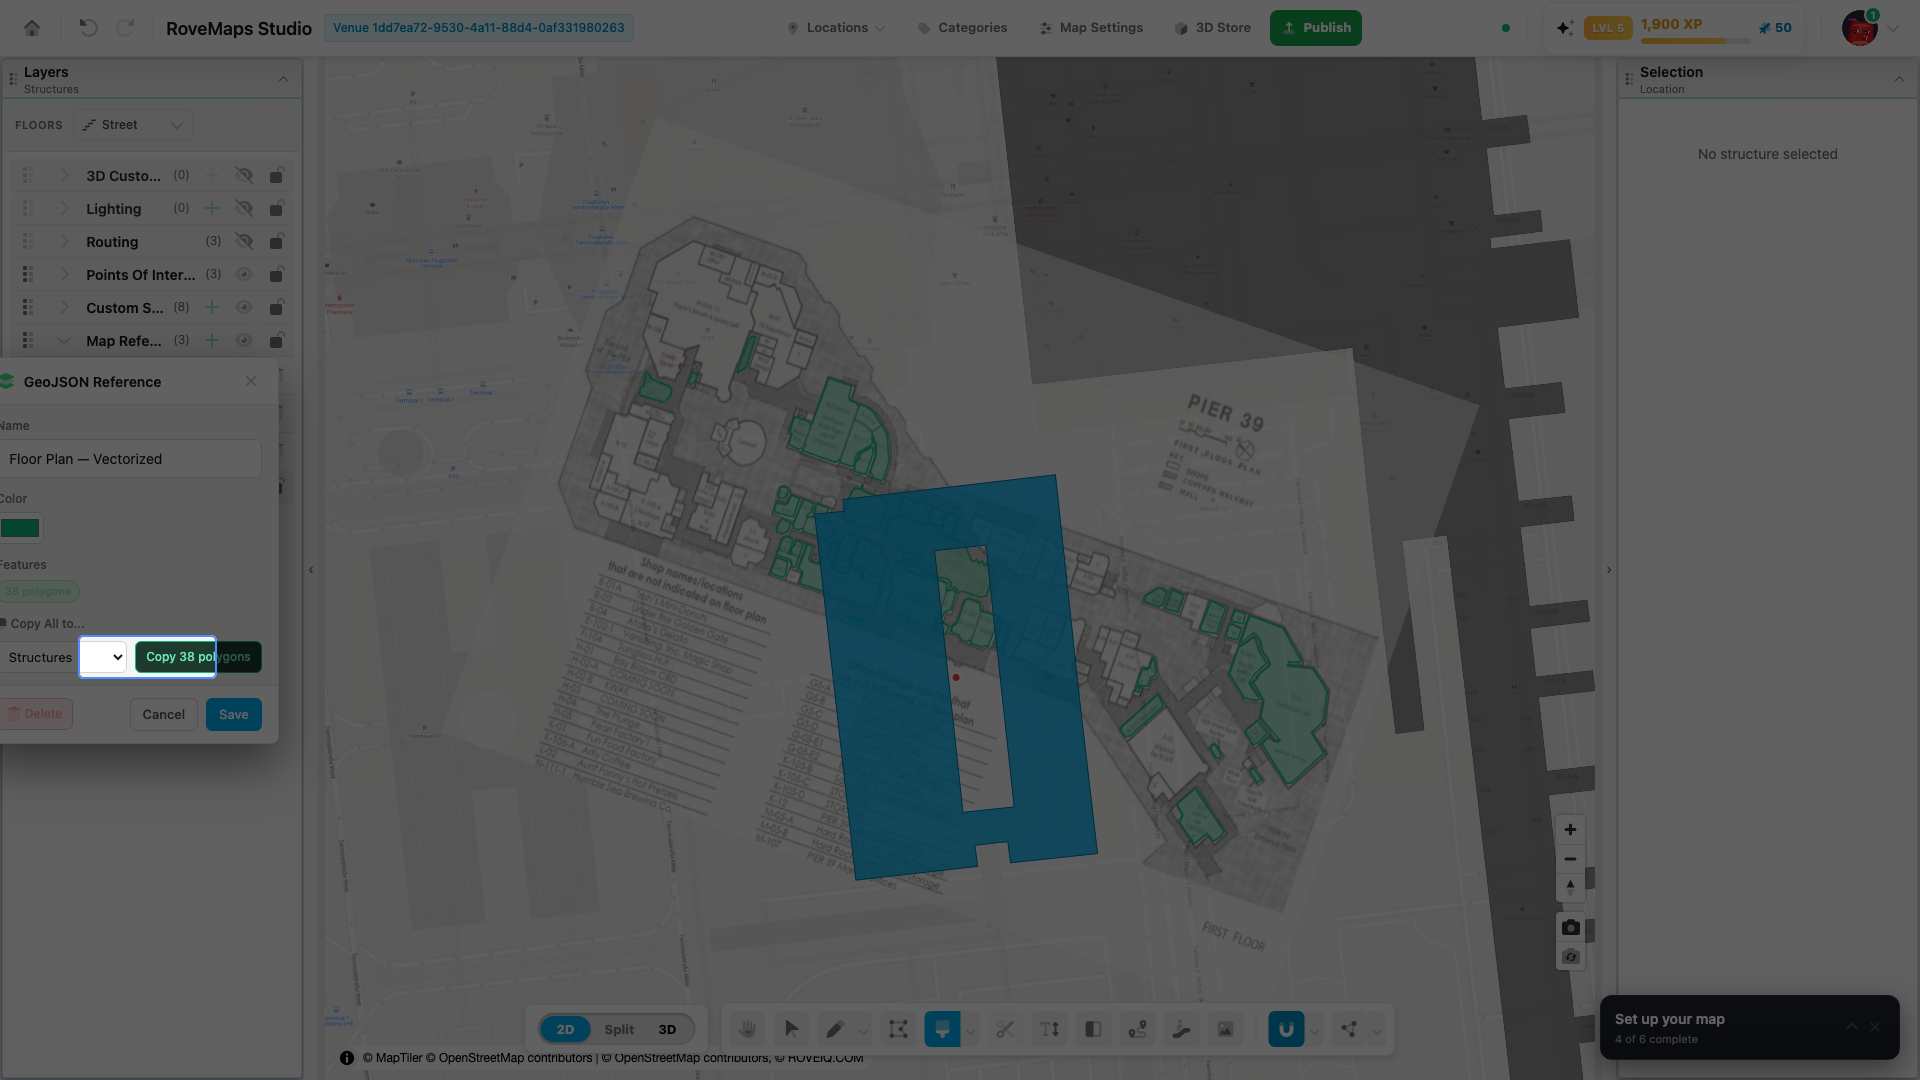
A GeoJSON reference is a guide until you copy its features onto a real layer. Open the reference and use Copy All to… to copy its features onto a structures, styles, or map layer, where they become editable, publishable content.
Create a blank layer
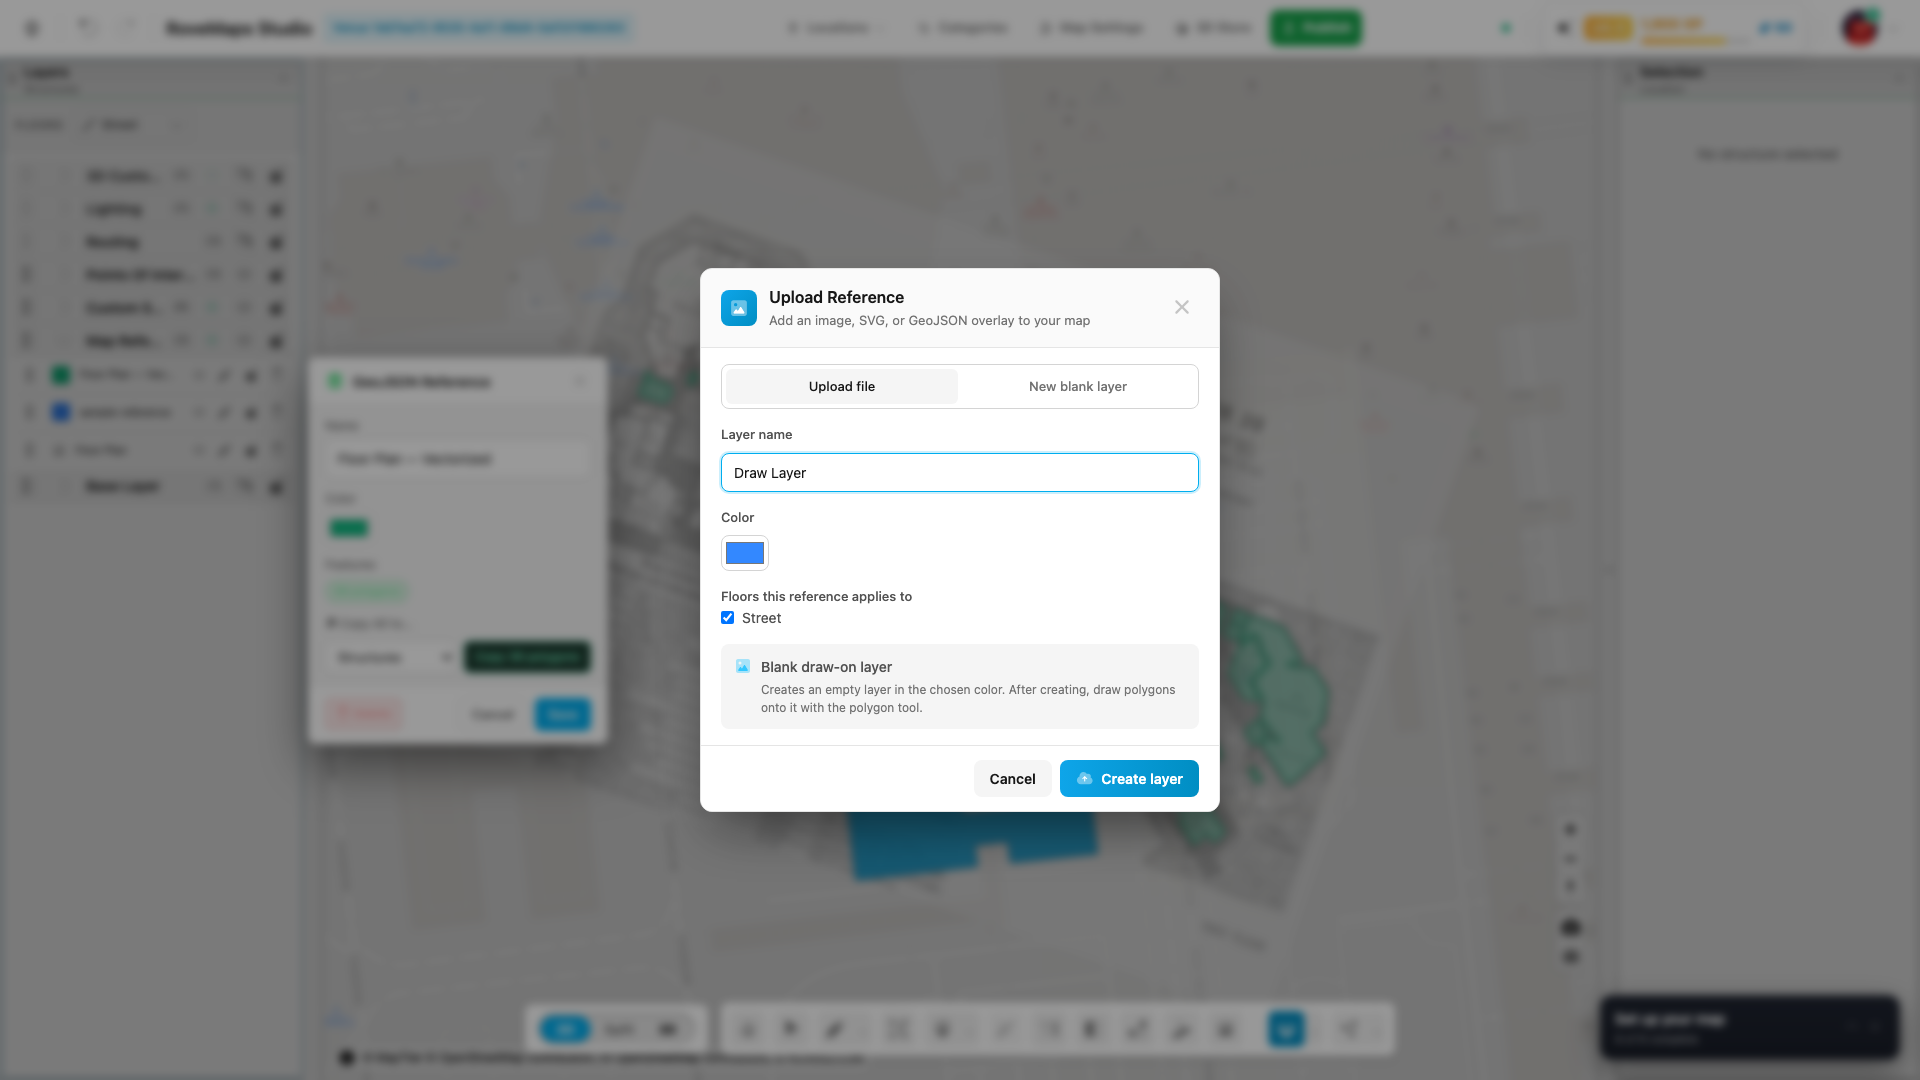
If you want to draw from scratch rather than import, switch to the New blank layer tab, give the layer a name and color, choose its floor scope, and click Create layer. You get an empty reference layer to draw on.
Vector
Vector references bring in line-art drawings and convert them to shapes you can edit.
Import an SVG
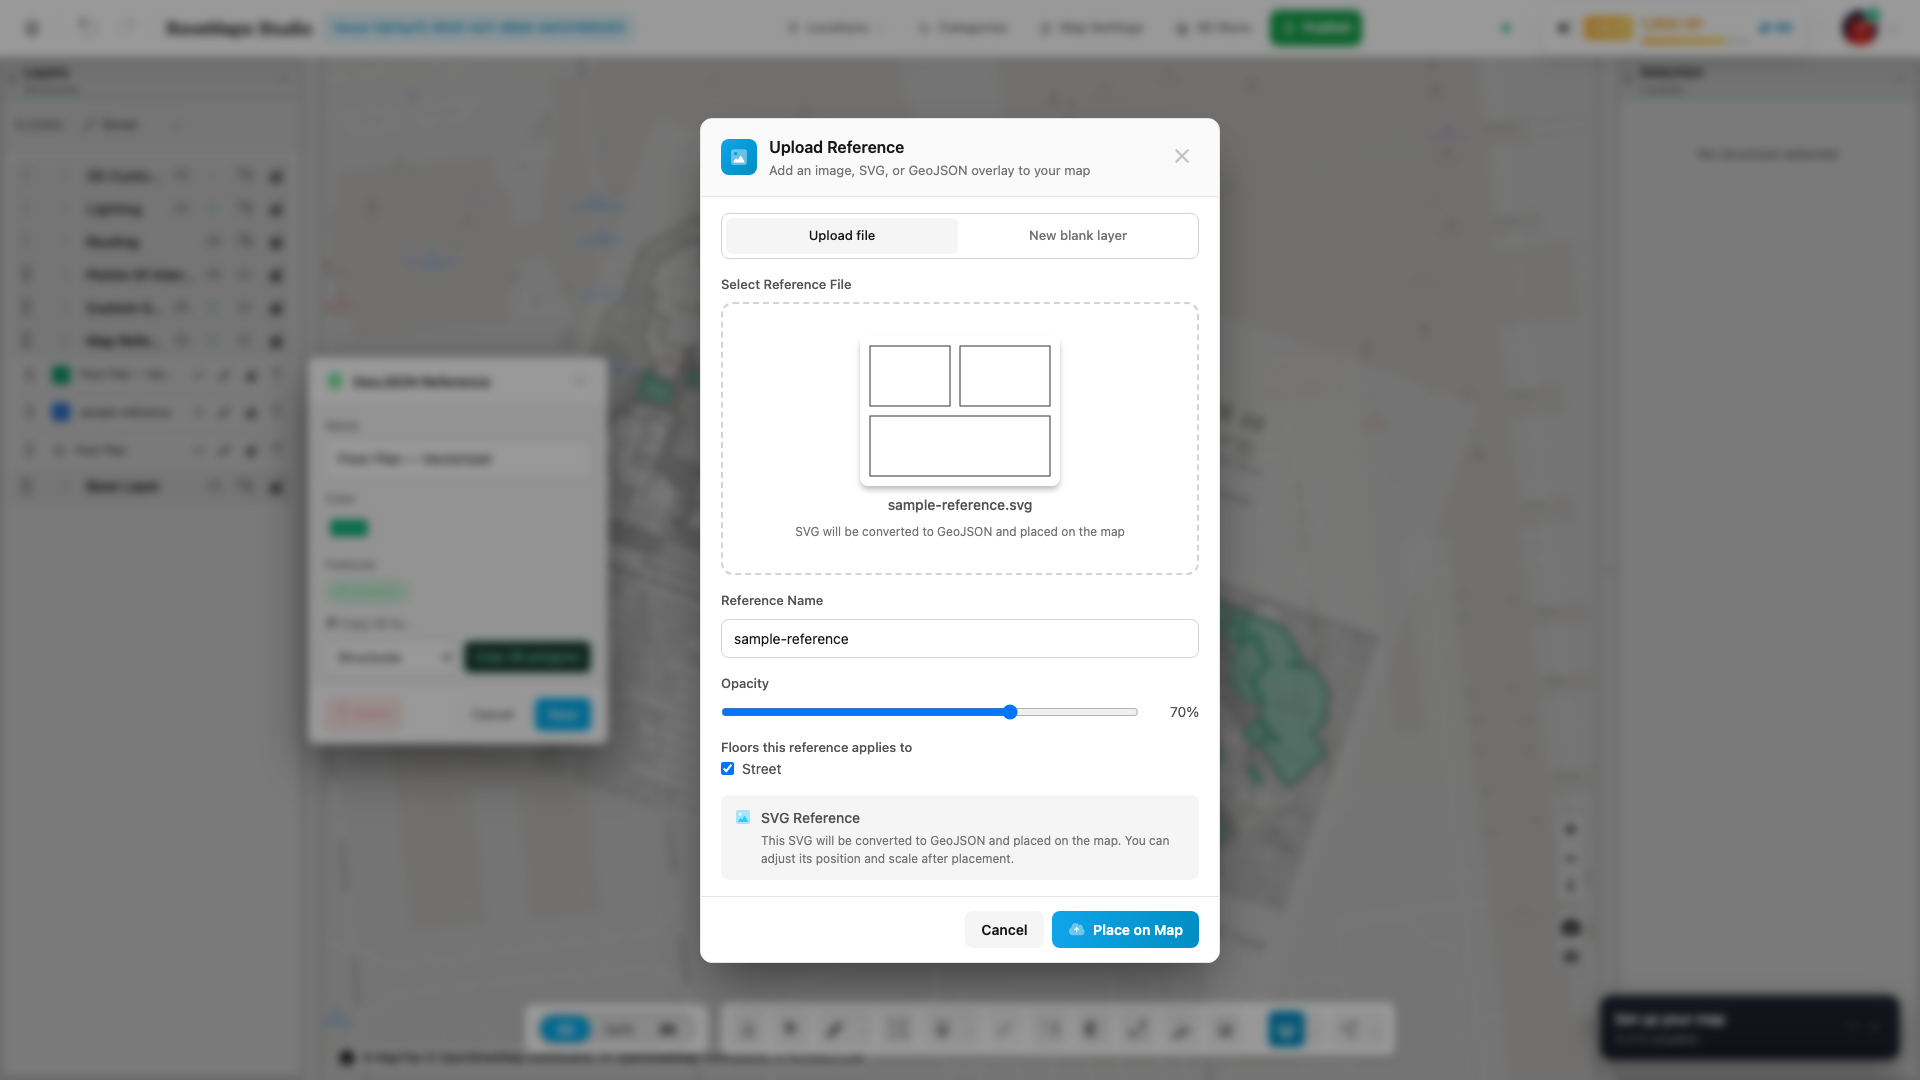
- Open the reference uploader and, on the Upload file tab, pick an
.svgfile. - Name it and choose its floor scope.
- Click Place on Map, then position it. The SVG’s paths are converted to GeoJSON shapes you can trace or copy.
Import a PDF
- Open the reference uploader and pick a
.pdffile (up to 50 MB). - If the PDF has more than one page, a page picker appears — click the page you want. Studio renders that page to a high-resolution image in your browser. Single-page PDFs skip the picker.
- From there the flow is the same as Upload a floor plan: name it, choose its floors, click Place on Map, position it, and optionally vectorize it.
Each pass imports one page — use Add another reference from the completion card to bring in the next sheet. Password-protected PDFs aren’t supported; remove the password and re-upload. PDFs are imported as images: for a true vector reference, export your file as SVG and use Import an SVG.
Import a shapefile
Importing Esri shapefiles (.shp) directly is coming soon. For now, convert your shapefile to
GeoJSON in a GIS tool and use Import a GeoJSON file.
Glossary
- Reference — background artwork (image, GeoJSON, or SVG) you trace or copy over; not published map content by itself.
- Raster — a pixel image such as a scanned or exported floor plan.
- Georeference — placing and scaling a reference so it sits at the correct real-world location.
- Vectorize — detecting shapes in a raster image and converting them to editable polygons.
- Floor scope — whether a reference shows on all floors or only the current one.