Paint Tool
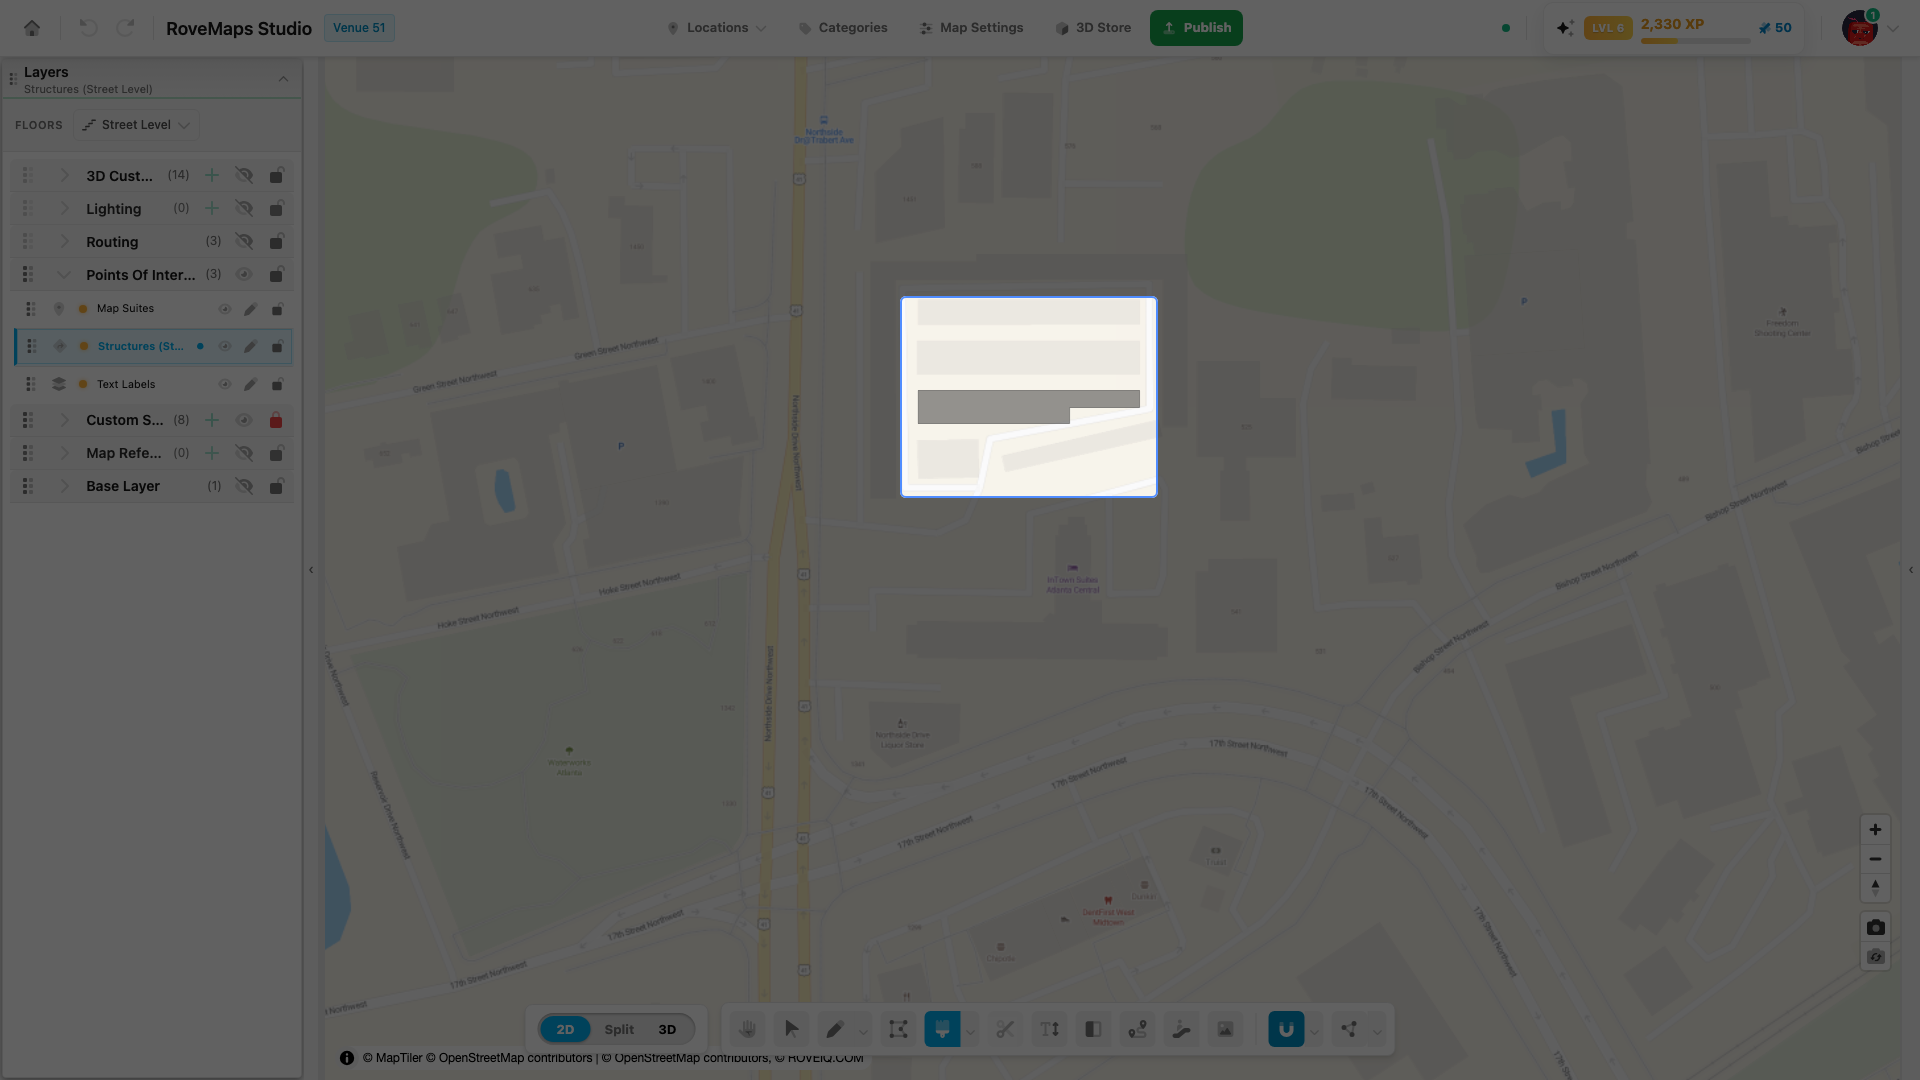
The Paint Tool paints existing OpenStreetMap features — buildings, parks, water, and roads — onto your map. Hover an OSM feature to preview it as a dark-grey shape, then click to add it to the selected layer. Painting a Structures layer creates a full structure with its suite and door; painting a Custom Style layer creates a single style polygon. It can also fill an enclosed gap between shapes you have already drawn, and — on a Routing layer — paint OpenStreetMap roads straight into your routing network.
Paint from OpenStreetMap
- Select a Structures or Custom Style layer in the Layers panel — the Paint Tool stays disabled until one is selected.
- Click the Paint Tool brush button in the toolbar. On first use, acknowledge OpenStreetMap (see Acknowledge OpenStreetMap).
- The basemap switches to the default street map and the view locks to a close zoom (around level 16) so OpenStreetMap features are visible.
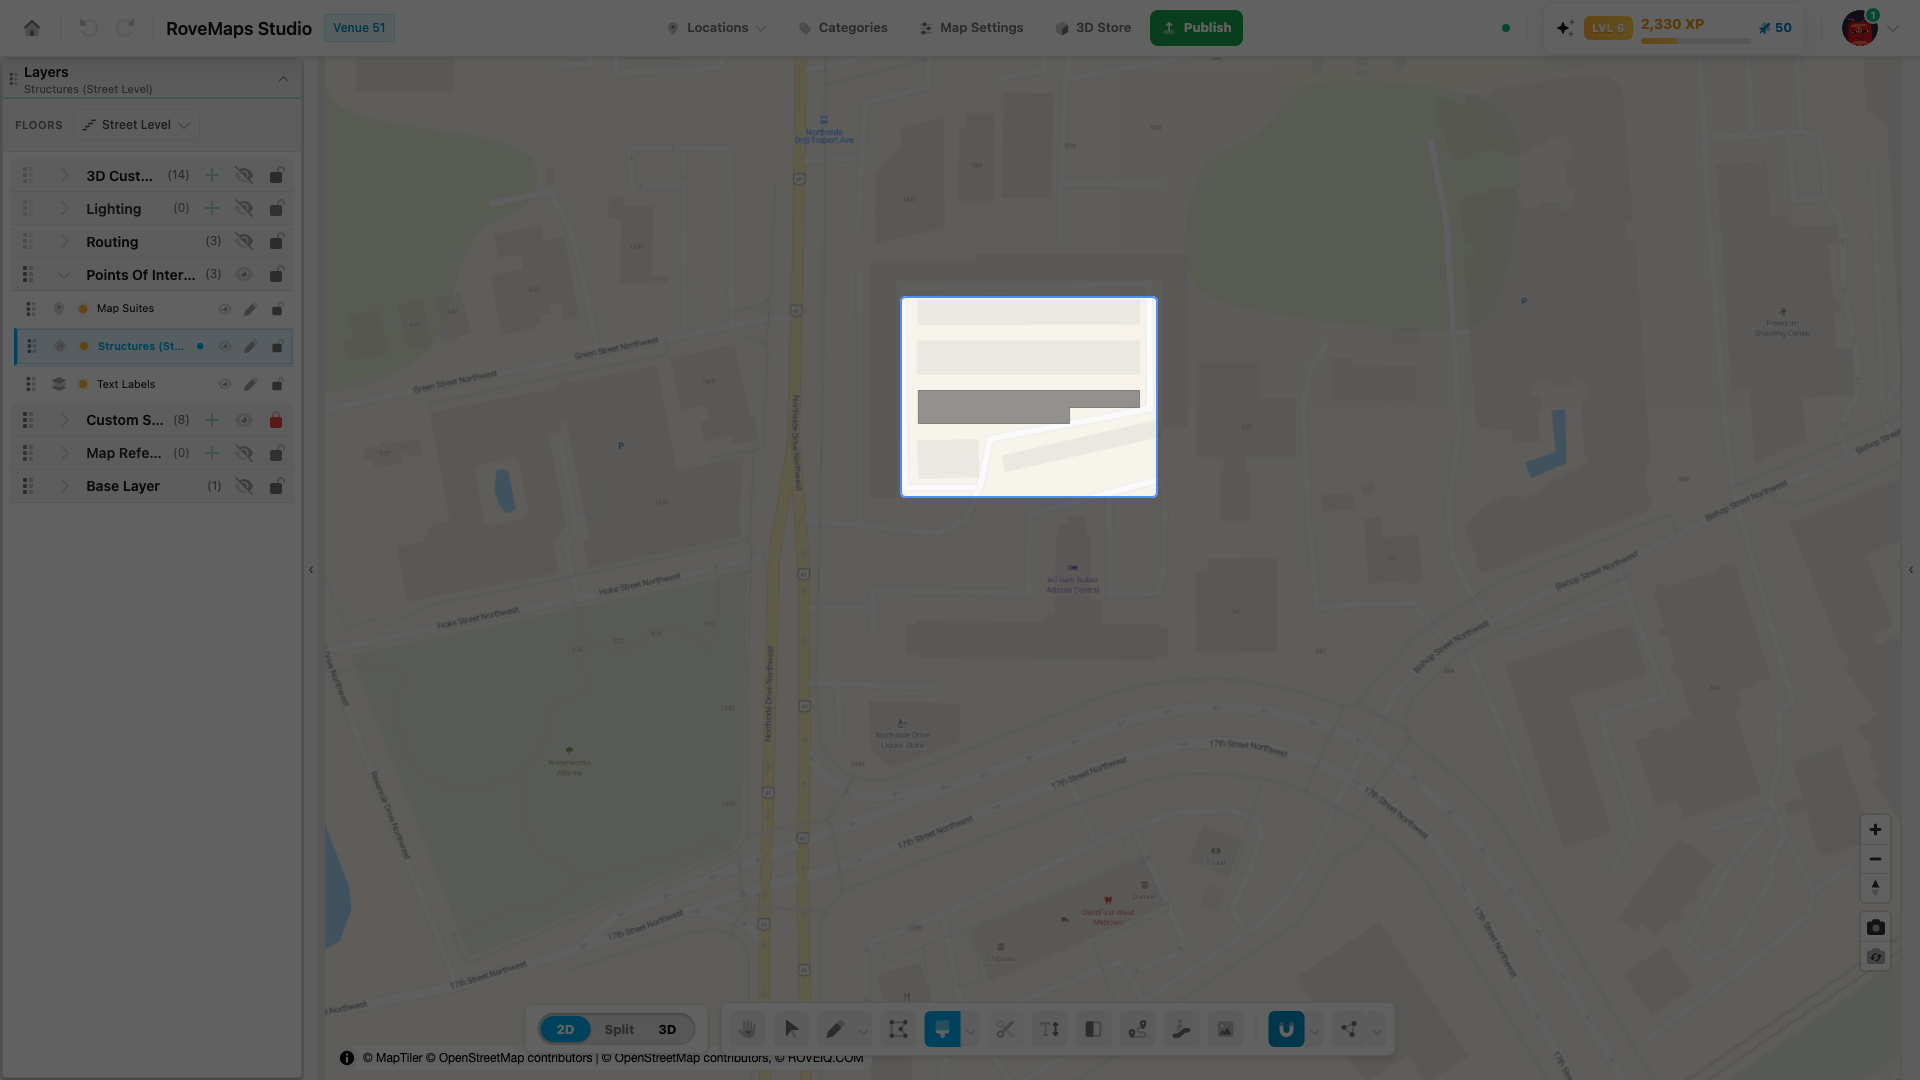
- Move the cursor over a building, park, water body, or other feature. A dark-grey preview shows the shape that will be painted.
- Click to paint that feature onto the selected layer.
- Repeat for each feature. Switch tools to exit.
Notes
- The tool is enabled on a Structures or Custom Style polygon layer, or on a Routing layer (see Paint roads onto the Routing layer). On other layers the brush is disabled, and the tooltip explains why.
- Painting a Structures layer creates a structure together with its map suite and door, the same as drawing one by hand. Painting a Custom Style layer creates a single style polygon with no suite or door.
- Each click paints the single feature under the cursor — the topmost one. Roads are lines, so they are buffered into polygons one segment per click (see Paint roads into polygons).
- Very large area features such as national parks, big lakes, and zoning blocks are skipped, so the cursor falls through to a smaller feature beneath. Buildings are never size-capped.
- Switching the basemap to the default street map stays in effect after you leave the tool. The zoom lock is removed when you exit.
Publish impact: painted features stay in your draft until you Publish. A Structures paint adds a structure, suite, and door; a Custom Style paint adds one style polygon. They appear in the publish preview as new features, the same as features you draw by hand.
Fill an enclosed gap
The Paint Tool can also fill the empty space between shapes you have already drawn — a courtyard ringed by rooms, the hole in a donut-shaped structure, or any pocket fully enclosed by your Structures and Custom Style shapes on the current floor. Hover the gap and the enclosed space highlights on its own; click to fill it with a new feature shaped exactly to that space. No OpenStreetMap feature is involved — the shape comes from your own walls.
- Draw the shapes that surround the empty space on a Structures or Custom Style layer.
- Open the Paint Tool with a Structures or Custom Style layer selected.
- Move the cursor into the enclosed gap. When the surrounding shapes fully close it off, the gap highlights as a dark-grey shape.
- Click to fill the gap. The new feature is created on the selected layer, the same as a painted or hand-drawn shape.
Notes
- A gap has to be fully enclosed to be fillable. If there is even a small opening in the surrounding shapes, the gap will not highlight — instead the preview falls through to the OpenStreetMap feature underneath, which is a useful cue that the outline is not yet closed. Close the opening and the gap becomes fillable without leaving the tool.
- Only visible Structures and Custom Style shapes on the current floor form the walls of a gap. Hiding the layer that encloses a space makes that space stop highlighting, and the preview falls through to OpenStreetMap.
- The fill matches the enclosed shape exactly, including the inside of a donut — hover the hole and it fills just the hole.
- Undo removes a gap fill in a single step, the same as any painted feature.
Paint roads into polygons
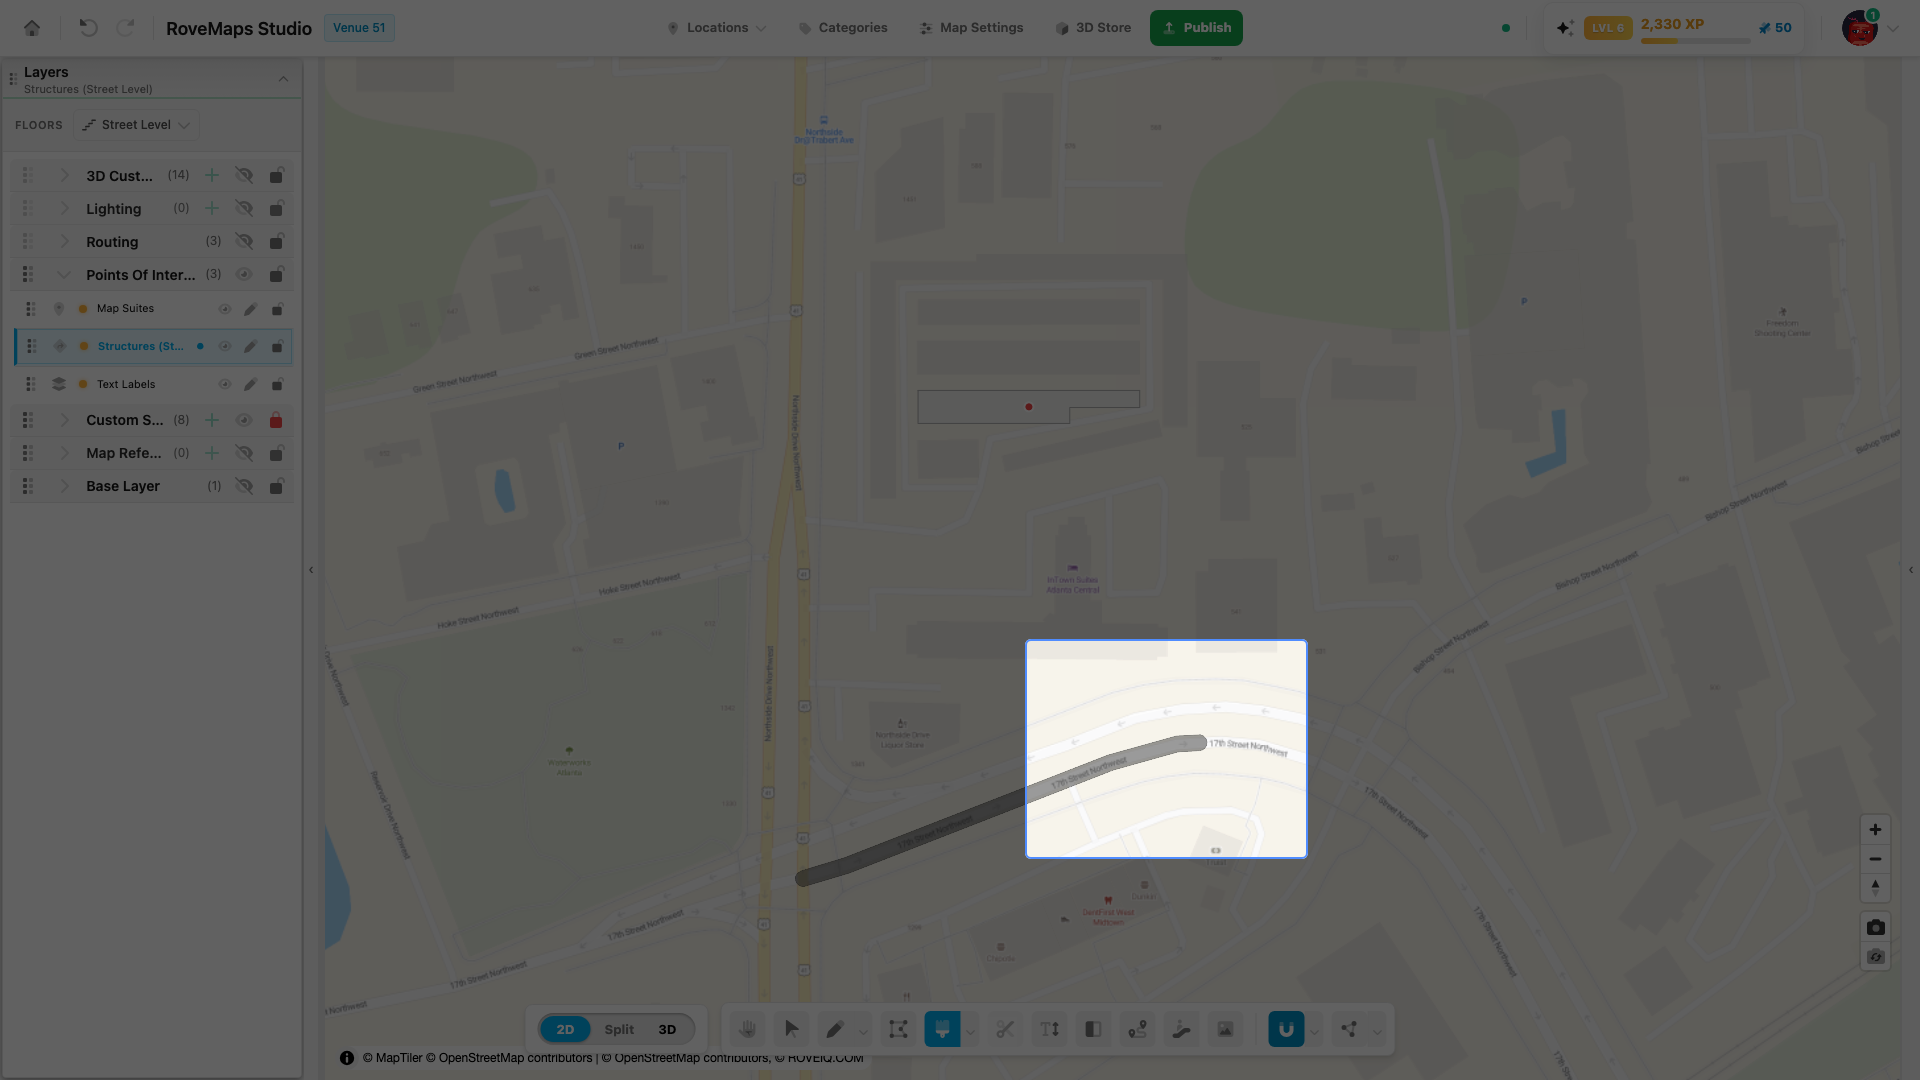
OpenStreetMap roads and paths are lines, not polygons. When you hover one, it is buffered into a polygon sized for the road class before it is painted. The geometry comes from OpenStreetMap — the same source as buildings and parks — not from your venue’s Routing layer.
- Select a Structures or Custom Style layer and open the Paint Tool.
- Hover an OpenStreetMap road, footpath, or other transportation line. The preview shows the line buffered into a polygon at the width for that road class.
- Click to paint the buffered polygon onto the layer.
- Each click paints the road segment under the cursor. Click along a road to paint it segment by segment.
Notes
- Roads are buffered by class. Motorways and trunk roads are widest (4 m radius by default), down to service roads, tracks, and paths (1.3 m). The painted width is roughly twice the radius.
- The buffer is clipped to the current view, so painting a long road may take several clicks as you pan.
- Default class widths are configurable — see Configure road buffer widths.
- On a Structures or Custom Style layer the road is painted as a polygon, and its shape comes from OpenStreetMap — not from your venue’s Routing layer. To add OpenStreetMap roads to your Routing layer as routing lines instead, see Paint roads onto the Routing layer.
Configure road buffer widths
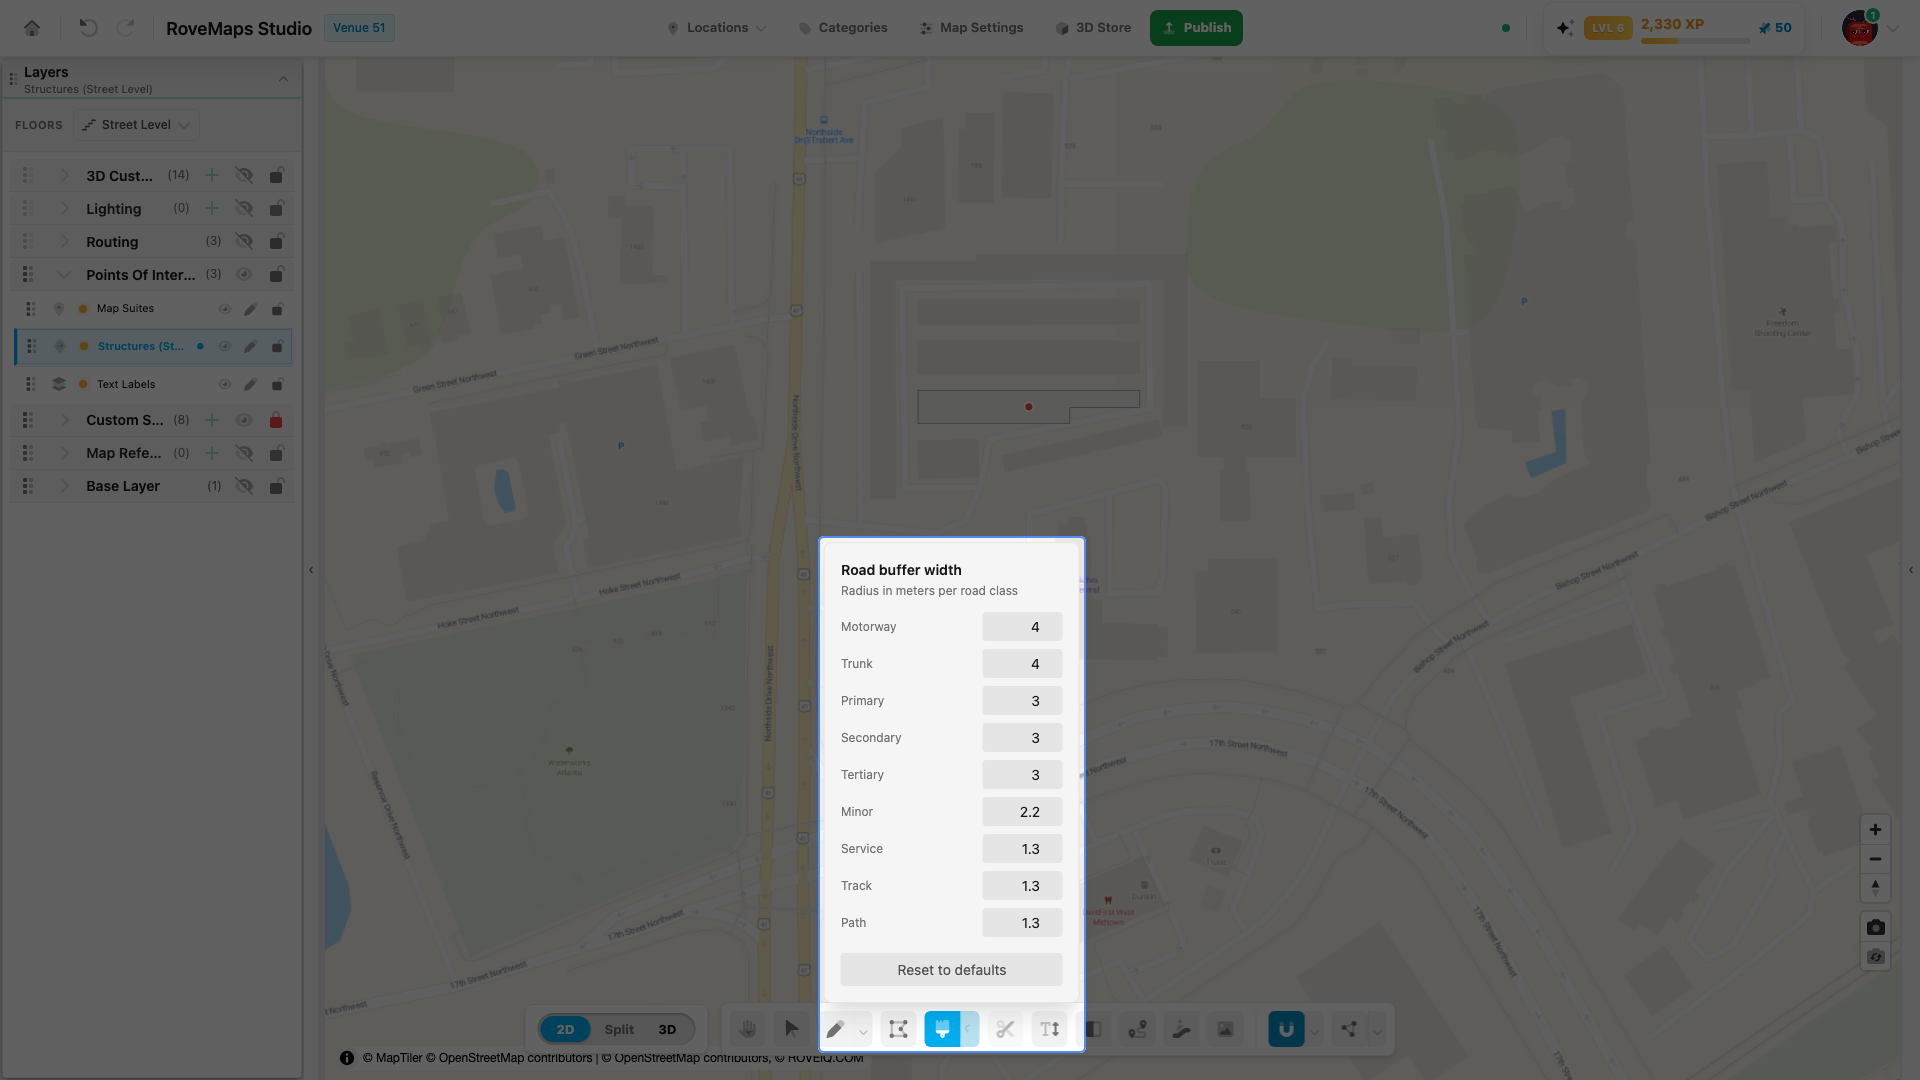
When the Paint Tool paints an OpenStreetMap road, it buffers the road line into a polygon using a width set per road class. You can adjust those widths in the Road buffer width panel.
- Select a Structures or Custom Style layer so the Paint Tool is available.
- Click the chevron next to the Paint Tool brush button to open the Road buffer width panel.
- Edit the radius, in meters, for any road class — motorway, trunk, primary, secondary, tertiary, minor, service, track, or path.
- The new width applies to the paint preview and to roads you paint from then on.
- Click Reset to defaults to restore the original widths.
Notes
- Widths are a radius in meters; the painted road is roughly twice as wide.
- Default radii: motorway and trunk 4 m; primary, secondary, and tertiary 3 m; minor 2.2 m; service, track, and path 1.3 m.
- Only road classes are editable here. Path-type subclasses such as footways, cycleways, steps, and corridors use a fixed 1.3 m radius and are not shown in the panel.
- Widths are saved in your browser and persist across sessions. They are per-browser, not per-venue, and do not change roads you have already painted.
Paint roads onto the Routing layer
Select a Routing layer and the Paint Tool paints OpenStreetMap roads and paths straight into your routing network as lines, not polygons. Hover a road and it highlights as a line along its centreline; click to add it to the Routing layer as routing segments. This is the fastest way to seed a venue’s paths from the surrounding street network.
- Select a Routing layer in the Layers panel.
- Open the Paint Tool. On first use, acknowledge OpenStreetMap (see Acknowledge OpenStreetMap).
- Hover an OpenStreetMap road, footpath, or other transportation line. It highlights as a line, not a buffered polygon.
- Click to add that road to your Routing layer.
- Click along a road to add it piece by piece; pan and keep clicking to continue a long road.
Notes
- Painting a Routing layer adds routing lines; painting a Structures or Custom Style layer buffers the same roads into polygons instead (see Paint roads into polygons). The layer you have selected decides which you get.
- Each click adds the road piece currently in view. Painting a long road may take several clicks as you pan.
- Painted routing lines are not automatically connected to your existing routing lines — the same as drawing routing over them by hand. Use the routing tools to join them where they should connect.
- A whole painted road undoes in a single step.
- If you switch to a non-routing layer mid-paint, a click does nothing — the line preview will not commit to a polygon layer.
Publish impact: painted routing lines join your venue’s Routing layer in the draft and are published with it, the same as routing you draw by hand.
Acknowledge OpenStreetMap
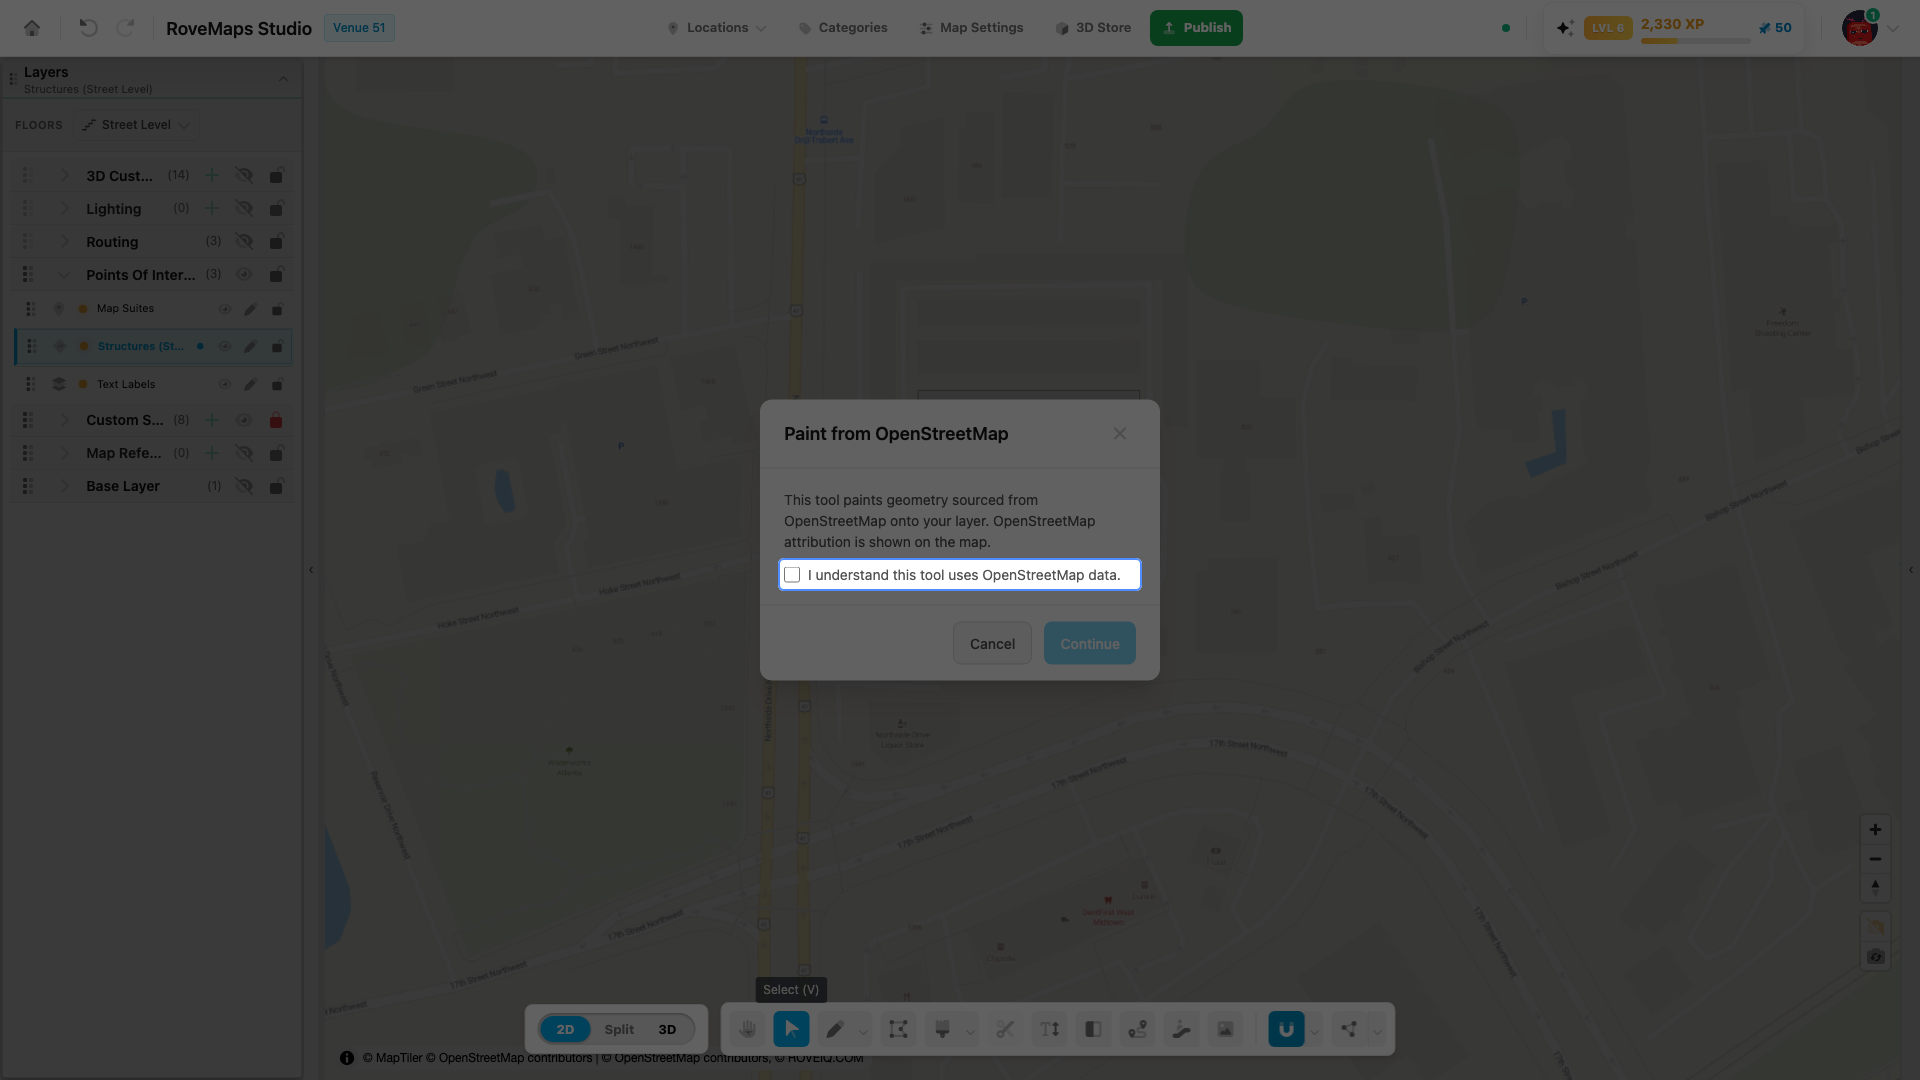
The Paint Tool traces geometry sourced from OpenStreetMap. The first time you use it, a one-time dialog asks you to acknowledge that the data comes from OpenStreetMap. The map keeps the OpenStreetMap attribution visible while you paint.
- Select a Structures or Custom Style layer and click the Paint Tool brush button in the toolbar.
- On first use, the Paint from OpenStreetMap dialog opens.
- Check I understand this tool uses OpenStreetMap data.
- Click Continue to start painting, or Cancel to close without painting.
Notes
- Continue is disabled until the checkbox is ticked.
- The acknowledgment is asked once per browser. Later activations open the tool directly.
- The OpenStreetMap attribution (”© OpenStreetMap contributors”) stays visible on the map while the tool is active.
- OpenStreetMap geometry is served through OpenFreeMap’s planet tiles.
Glossary
- Paint — click an OpenStreetMap feature to copy its shape onto the selected layer as an editable feature of your own.
- Preview wash — the dark-grey shape shown under the cursor: exactly what a click will paint.
- Gap fill — filling the empty space fully enclosed by your own Structures and Custom Style shapes on the current floor, without an OpenStreetMap feature.
- Enclosed gap — a pocket of empty space completely ringed by your shapes (a courtyard, a donut hole); only a fully closed pocket can be filled.
- Road buffer — the polygon built around a road line, sized by a per-class radius in meters; the painted road is roughly twice the radius wide.
- Road class — OpenStreetMap’s road category (motorway, trunk, primary, … path); each class has its own default buffer radius.
- Acknowledgment — the one-time per-browser dialog confirming the tool uses OpenStreetMap data.